I am sure that you have had your fair share of bugs either the crawling type or the buzz bomb type. I will try to give you some hints and tips on how to get rid of both types safely and cheaply.
So lets go.
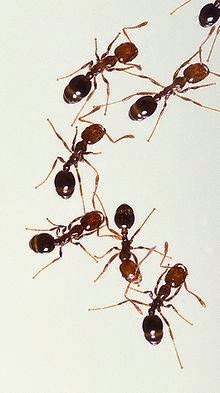 |
| Ants |
Ants we all seem to collect them either during storage or while camping. Here is a cheap and pet safe way to get rid of them both in the RV or your sticks and bricks.
You need to mix in equal parts of
1 part baking soda
and
1 part powdered sugar (not the granulated kind used in coffee)
You will need.
1 lid from any jar
Mix the baking soda and powdered sugar and put into jar lid and put out where you have seen the ants. It will not be long and the ants will be gone. So you may ask why this works. Inside of ants there is an acid type fluid when mixed with the baking soda causes the ants to explode. If you or the dog should eat the mixture nothing much happens, it just doesn’t taste good.
Corn meal is another safe way to get rid of ants, but it can be a bit messy. Just sprinkle the meal around the nesting area or along the ant trail. In a day or so the ants will be gone.
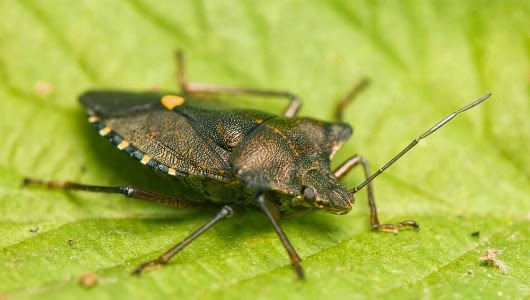
Stink Bugs
These little devils are not native to the USA but, like many of our ancestors have immigrated to a better life here in the USA. So how do you get rid of them now that they have hitched a ride in your RV?
In a spray bottle, combine 32 ounces of hot water and three-quarters of a cup of Dawn dish washing liquid and spray the exterior of your RV’s, windows, and doors. On the inside spray around baseboards inside cabinets, closets, and any other dark area inside the RV. For an extra kick, you can use the anti-bacterial variety of dish washing liquid, but understand that it contains additional chemicals. Of course a good bug spray will also work but might not be safe for Fido.
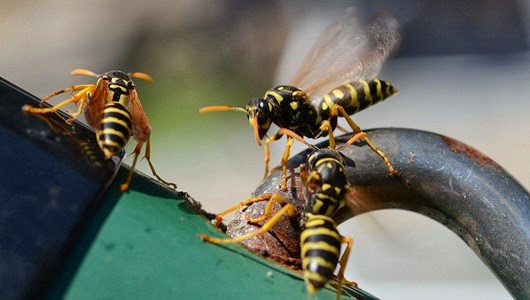
Wasps
You are getting your RV ready to go for spring and you spie a wasps nest or several wasps returning to the same spot time after time. What can you do? Well spray the area or nest with WD40 and that will rid you of the nest or neutralize the area that the wasps were going to use to build their nest.
There are also a variety of commercially made glass wasp traps that claim that they are helpful in reducing wasp populations in the area. The trick is to make sure you keep replacing the bait, as wasps like fresh bait. And also, please consider using savory bait, such as tuna, as that will attract the yellow jackets and wasps, but not honeybees, which a sweet bait will. The glass traps are actually very pretty, but you can also make your own inexpensive version out of any type of plastic bottle (soda pop bottle, or water bottle). Follow these instructions to make your own.


Mud Dauber (Wasp)
While these wasps are non aggressive to humans, they do cause problems to RVers by getting into places they should not be. Like gas orifices of the heating system, hot water system, and refrigerator. The best defence here is to plug the holes leading into these areas of the RV. See below for screening suggestions.
 |
| Mosquito |
The scourge of the RV camping experience the Mosquito. First how do you keep them off you? Use Skin-So-Soft. You can purchase here Skin-So-Soft and it really does work for several hours. It is safe for kids and does not contain Deets. However during scientific tests, Deep Woods Off, proved to be the best you could buy in keeping Mosquitoes away from you. BUT it does contain DEETS. Please be careful when using Deets around children. Be sure to follow directions for use of the product.
So what about those flying around? We need to construct a mosquito trap. Please see below;

Take a plastic water bottle and cut the neck off. (The neck is the cone part of the bottle including the cap.)

Flip the neck upside-down, removing the cap first, and place the neck into the bottle.

Tape and/or staple the top together or punch a couple of holes and keep them together by two screws, which you can even use to hang the trap up.
Bait the trap. Mix 1/4 cup of Brown Sugar with 8oz of hot water. Mix thoroughly and allow to cool. After the mixture cools, pour into the bottom of the plastic bottle. Add 1/4 TSP of Yeast. DO NOT MIX!!! The mixture gives off carbon dioxide that attracts the Mosquitoes.


Tape some string to the bottle, (or make holes and put the string through) and hang it up near where you plan to be either outside or inside.
Once the Mosquitoes are tricked into going in they can’t figure out how to get out, so they get trapped and die.

Dispose of the Mosquito trap regularly whenever the number of dead Mosquitoes does not appear to be increasing.

You are now finished. You have saved the planet and your camping area from thousands (well maybe hundreds) of Mosquitoes.
We thank you!
So how do you stop or slow down bugs getting into your RV when the front door is kept closed most of the time? You put screens over the openings caused by the water heater, furnace, and refrigerator.
Lets take each one and see what can be done.
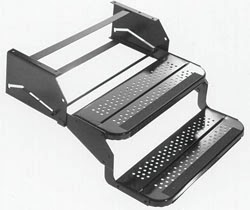
Water heater. You can buy a water heater vent screen, such as this one, Flying Insect Screen
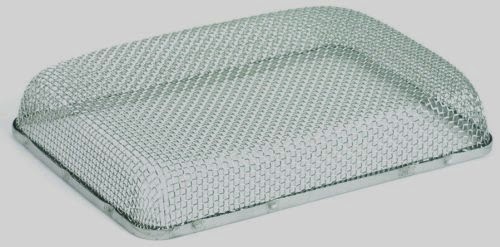
and install it (easy DIY project) over the water heater RV vent. I have a KZ Spree and could not find a water heater vent cover so I covered the inside of the water heater cover louvers with insect screen and used silicone to bond the screen to the metal water heater cover. Works great.
Furnace vent. You can buy a furnace vent screen, such as this one, RV Furnace Screen
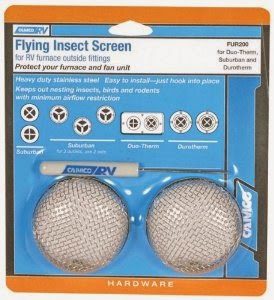
Kit comes with everything you need and will keep the Mud Daubers out.
Refrigerator Vents. You can buy a refrigerator vent screen, such as this one, Refrigerator Vent Screens

I installed these on my KZ Spree and use some zip ties to hold the screens in place so they would not move around. This was an simple DIY project and will keep the bugs and Mud Daubers out. Check around windows and doors for any cracks or small openings that may have developed and keep storage doors closed while camping and you should keep the bugs out and enjoy the indoors as much as the outdoors.
Until Next Time.