The Reason For RVer Hints & Tips

What I plan on doing in this group is covering subjects and topics that are of interest to the Travel Trailer(TT) and 5th Wheel (5er) RV owner. It seems to me that there are a lot of websites and blogs for the big class A motorhomes but not so many for the bumper pull behinds. I do not want to get hung up on which rig is the best or what do I buy to pull my RV.  I want to spend your time on giving you hints and tips that will make your camping experience with your family the best and safest it can be.

Until next time.

How To Sleep Better In Your RV

It is no secret that most RV mattresses are not very comfortable and that a good night’s sleep is often a long way off.  I am not going to discuss the Midnight Train that comes through most campgrounds.  What I do want to discuss is what you can do to get a good night sleep in your RV.

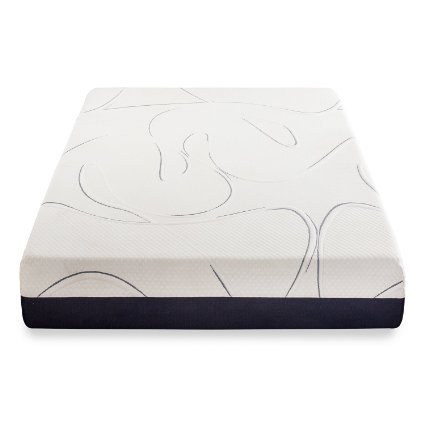
The very first thing you could do is get rid of your mattress and get one of these deep foam jobs.  I know, I know they are expensive.  But the people I know who have spent the big bucks really sware by them as being a great way to get a good nights sleep.

12 Inch Foam Mattress King or Queen

Cushioned cover of yarn dye jacquard with superfine velveteen borders and decorative piping help to keep your sheets in place.

Sleep cool layering system-2.5″ MyGel® memory foam, 1″ premium 3lb memory foam, 3″ of Pressure Relief Foam.

Base support layer of 5.5″ high-density foam to provide long lasting durability and stability.

The product is treated with green tea, a natural odor protectant.

I realize this suggestion is a bit expensive so, let’s look at some other solutions for a better nights sleep in your RV.

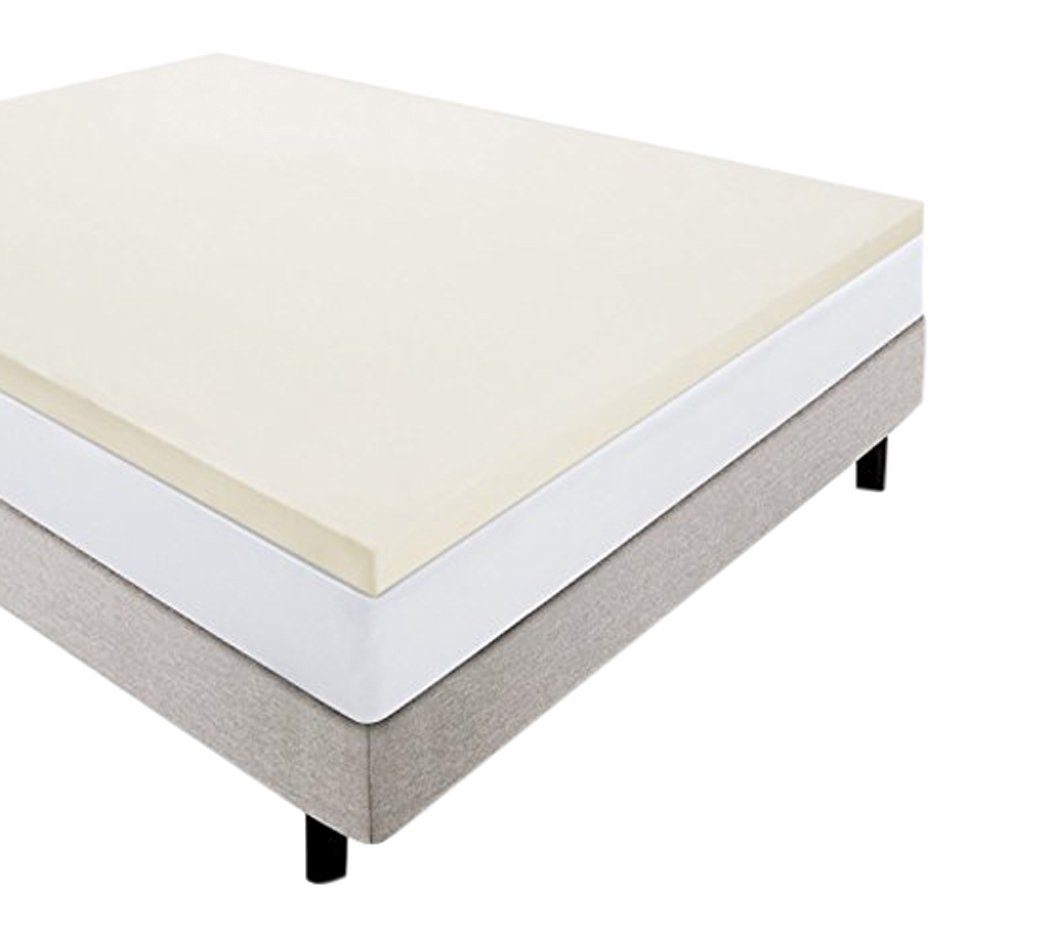
How about using your current mattress but adding a mattress topper?  This helps soften the top of the current bed and you may be able to get a good nights sleep.

2 inch Foam Mattress Topper

 2″ thick foam mattress topper

Soft foam conforms to body weight and position

LUCID foam offers superior comfort and pressure relief; great for camping and RVs

Correctly aligns the spine by supporting the head, neck, and shoulders

Naturally hypoallergenic – 3-year warranty

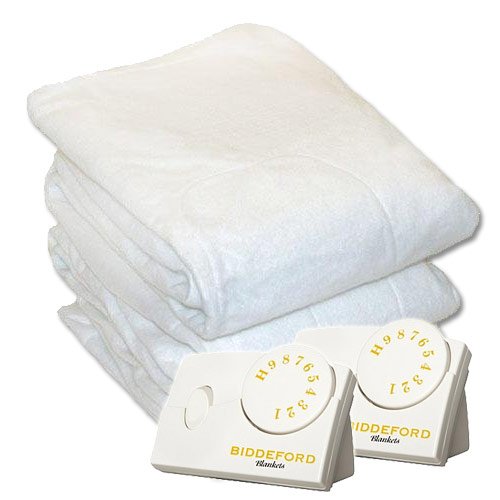
You are cold all the time and can not settle down for a good nights sleep you say.  How about a heated mattress pad?  You can adjust the heat for just the temperature Winter or Summer.

Dual Control Heated Mattress Pad

100% polyester

Made in USA and Imported

Therapeutic Heat

100-Percent Polyester Skirted Mattress Pad

All sizes

Machine Wash and Dry

5 Year Warranty

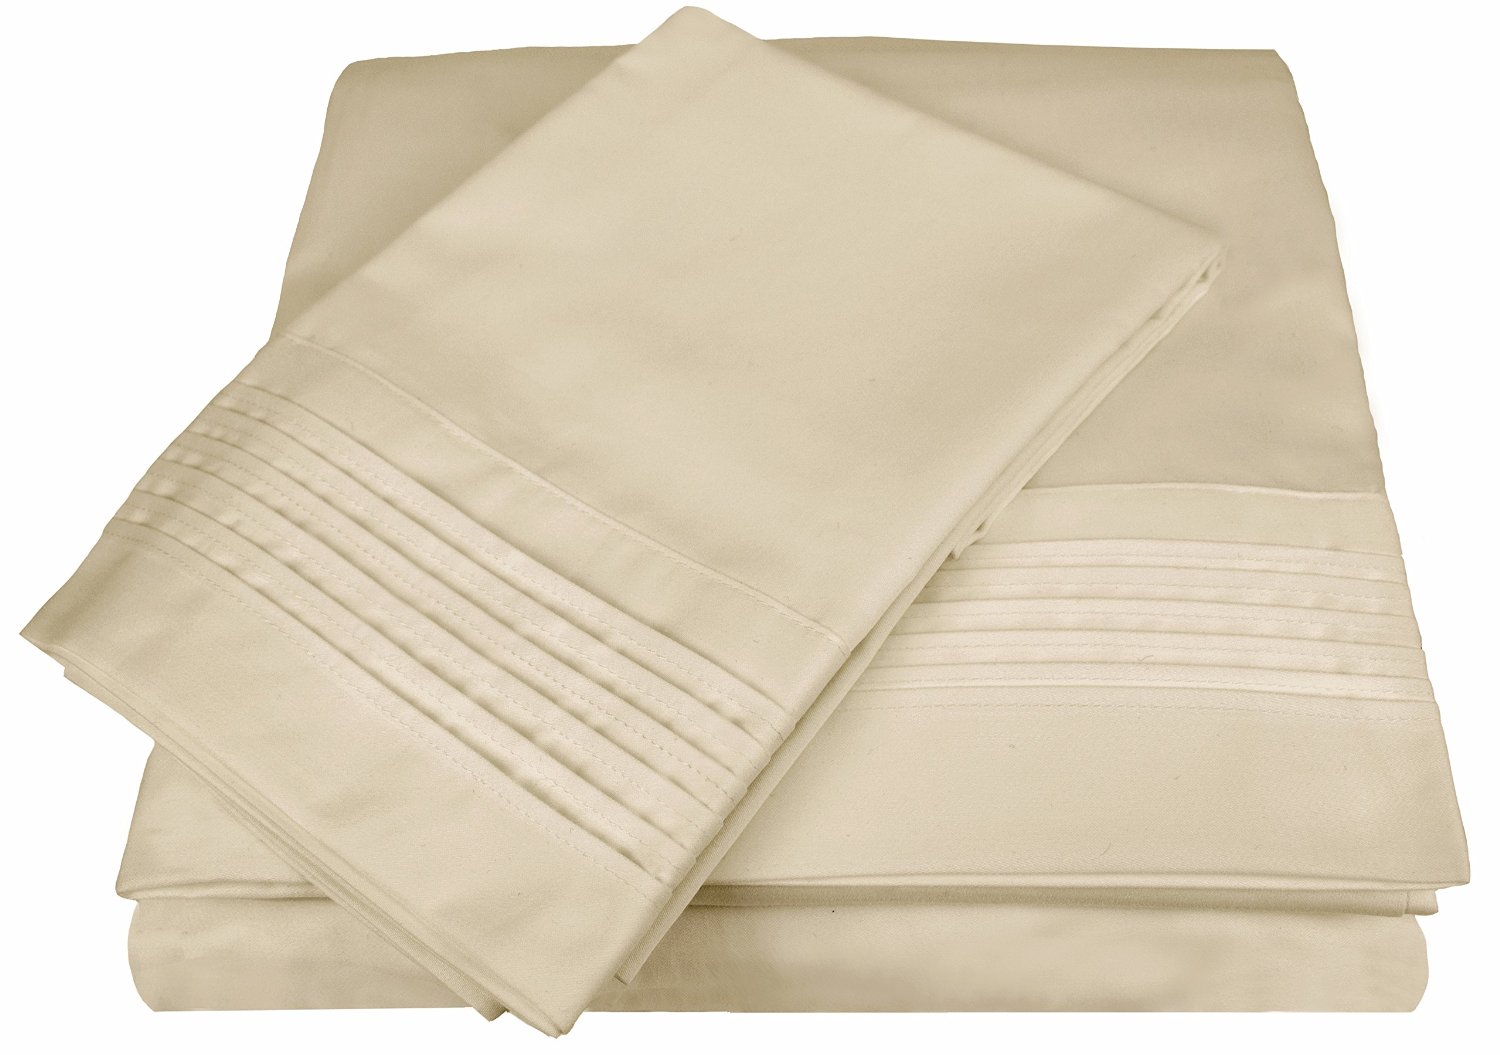
If you are still not comfortable maybe improved softness in your sheets would help.  How about some 700 count fitted sheets? The higher the thread count the softer the sheets.

700 Thread Count Bedding

Cotton Blend

All sizes have double the pillowcases! Twin has 2 – Full,  Queen, and King have 4!

Easy care and wrinkle resistant when following washing instructions.

Stylish Pleated Hem on Pillowcases and Flat Sheet.

Deep pockets will fit mattresses up to 18in.

Combed cotton 60’s yarn blend (60% Cotton / 40% Polyester) for smoother, sturdier and higher quality fabric.

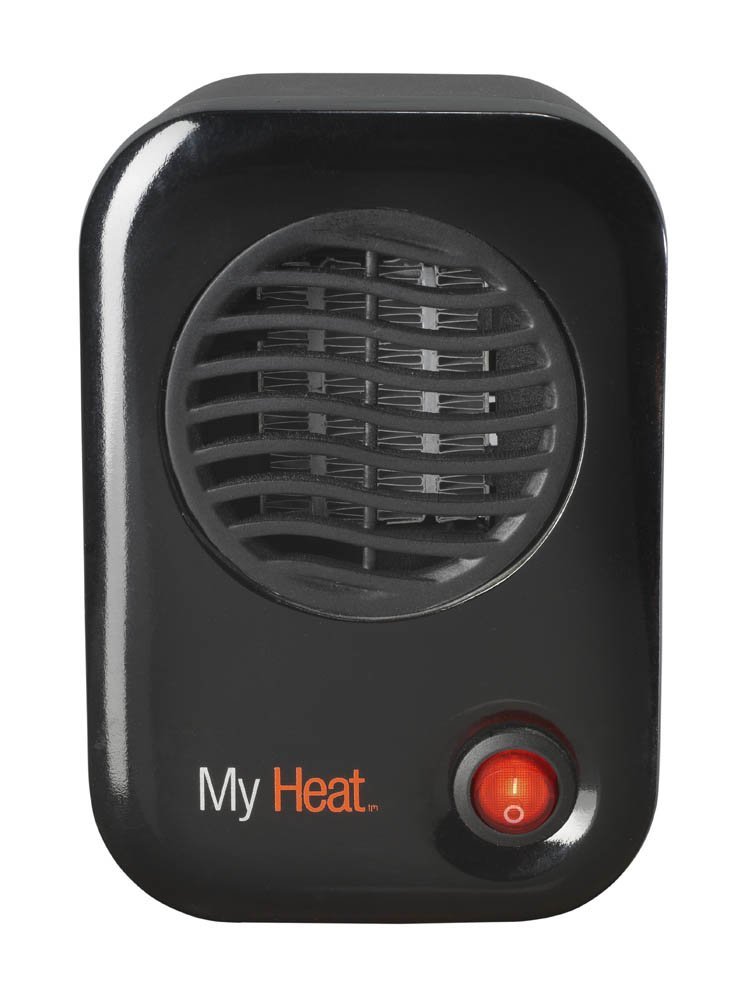
Maybe a personal electrical heater aimed right at you would do the trick.  This type of heater will not heat the whole room just you if it is aimed at you or maybe aimed just at your feet.

Personal Heater

 Self-Regulating Ceramic Element

Automatic Overheat Protection

Maximum Heat Power: 1.50 kW

Lower power useage saves on your energy bill and helps to elimanate tripping the circuit breaker if multiple heaters are used in an office setting.

Energy-Smart uses only 200 Watts

3.8″ x 4.3″ x 6.1″ tall. Fully assembled.

ETL listed

Safe ceramic element, overheat protection and cool-touch housing.

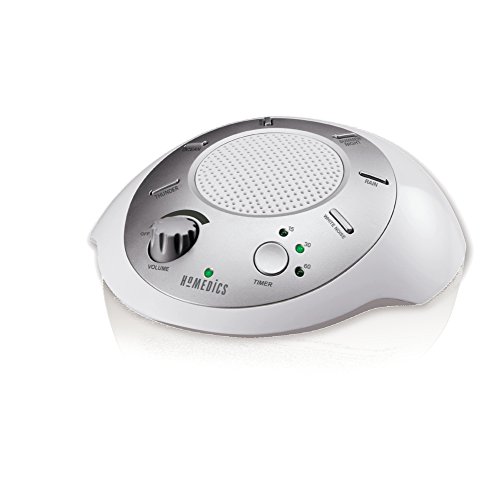
Ok so you may be comfortable but it is too noise.  You can keep the outside noise outside by using a Sleep Machine. A Sleep Machine generates different soothing sounds and because it is inside and closer to you.  It covers up or greatly reduces the outside sounds so you can sleep.

Sleep Machine

Six digitally recorded, calming sounds: White Noise, Thunder, Ocean, Rain, Summer Night and Brook

15, 30 and 60 minute auto off timer

Battery or AC adapter operated (AC adapter included)

Natural sleep aid

Great for the baby’s room or your room.

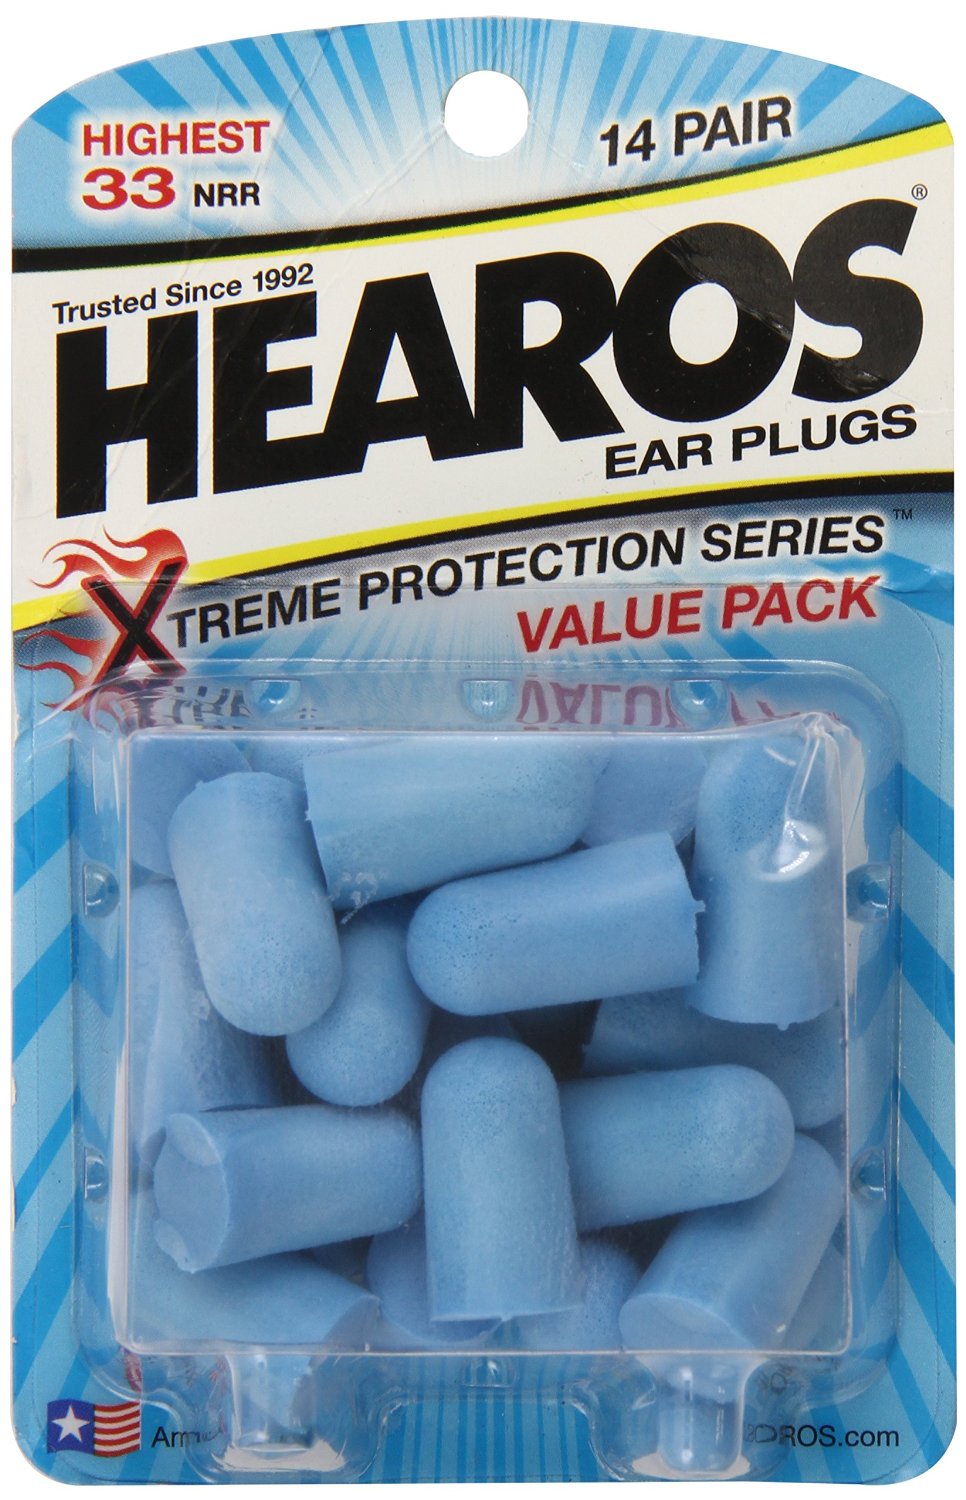
Or you could use some good quality ear plugs.

Ear Plugs

14 pair

Highest NRR 33. The highest certified level a foam ear plug has achieved is 33 decibels.

Super soft, smooth and comfortable, HEAROS Xtreme plugs are the professionals sole choice.

All HEAROS foam earplugs are Made in the USA at the HEAROS facility.

Physicians recommend HEAROS ear plugs for sleep, travel, studying, concerts and loud events

You could cover your eyes with a Sleep Mask.  This would block out any light that is coming into the room and help you get some sleep.

Sleep Mask

Sleep anywhere, anytime. Pull out this incredibly lightweight, comfortable sleep mask anywhere – in a bed, on a flight, on a long car ride, while camping – and enjoy uninterrupted deep restful sleep.

Sleep longer in complete darkness. Exposure to light during sleep interferes with your sleep cycle, preventing you from the long and deep night’s rest you need to function at your best. The Nidra mask completely blocks out all light and visual stimuli so you can nap or sleep soundly anywhere. Nidra’s mask is like having your own personal mobile black-out curtains. Sweet dreams.

You may have used this next item when the kids were very young. Lavender spray. Lavender spray calms the savage beast and lets you fall to sleep.

Lavender Sleep Spray

Just follow the directions on the spray bottle and get a good nights sleep.  Besides, it smells good too.

Here are some additional ideas on trying to get a good nights sleep in your RV.

1. Room should be dark.  Cover LED indicator lights with black electrical tape.  Some of those indicators are spot lights.

2. Room temperature should be between 60 and 67 degrees F.

3. Avoid large meals 2 to 3 hours before bedtime. Snack 45 minutes before bedtime.

Lastly, relax, relax, relax. Stop thinking of that loud neighbor or the neighbor’s kids.  Remember to have fun and relax.

Until next time.

Don’t forget to join the Weekend RVers on Facebook a no DRAMA place with Hints, Tips, Free Stuff, Recipes, for every kind of RVer.

Well, What Did You Forget This Time?

Whether you are a new Full Timer, a Newbie, a Part-Timer, or a Weekender we all seem to forget something vital to our RVing enjoyment or safety at the beginning of each season.  What do you really need to have to hook up your RV and have a safe but fun RVing experience? To find out I asked a bunch of Facebook RVers to give me a list of their most important, not to be forgotten, “must-haves” for the RV before you pull out.  Here is the list in no particular order.


1. Power Cord to hook up the RV along with an extension cord. You need enough to go to either end of your RV.

http://amzn.to/1R7Y3vP
15 Ft 50 Amp Extension Cable
http://amzn.to/1bYJI4w
25-Ft 30 Amp Extension Cord

2.  An extension drinking water hose is a must.  You should have a 25-foot regular hose and a 25-foot extension.

http://amzn.to/1bYKQoC
25 Foot Drinking Water Hose

I make the assumption that you already have a drinking hose with you.  If not, you are going to need one. Get a 25 foot one for everyday use and another 25 foot as the extension. (I once stayed at a park where the water was on one side of the TT and the electric was on the other side of the TT.)

3. Another good thing to have is a Water Hose Splitter for the park supply line. That way if you need some additional outside water you will not need to unhook the water supply to the rig.

http://amzn.to/1AATIH7
Plastic Water Hose Splitter

4. Extra sewer hose is a must these days.  With longer rigs you can’t leave home without it.

http://amzn.to/1E2ycwr
10 Foot Sewer Hose Extension

5. In addition, to the hose extension you should also have a short clear section of sewer pipe to keep an eye on what is coming out of the sewer and to know when it is done draining.

45 Degree Clear Fitting

With the above fitting, you can really see if that new RV TP really is quick-dissolving.

6. In some States and in some RV Parks you must raise the sewer line off the ground.  It is the law. There are lots of idea floating around but here is one of the simplest.  Remember in some States this is required.

7. If the park you are staying at has Cable TV you will need some TV cable to go from the Utility Box to the rig.

25 Ft RG6 Cable TV Wire

8. How about better tasting water?  Please read the Blog Post on “Water Out Of The Campground Faucet, YUCK!!” for all the best options but, here is just one.

RV Water Filter

9. A good tire pressure gauge is vital for any RVer.  A cheap one is not an option.  As always check your RV tires when Cold.

Good Digital Tire Gauge

10. Wheel Chocks are the next must-have item.  Oh, the Horror Stories I could tell.  Get some Chocks.

RV Wheel Chocks for Pull Behind RVs.

11.  For reasons of safety and anti-theft I also recommend an X-Chock.

Locking Chock

12. A spare set of water hose washers is a good idea.

Water Hose Washers

13. And by all means an RV 30 or 50 amp (depending on your RV’s power requirement) Power Management Protector (Surge Protector).

30 Amp Surge Protector
50 Amp Surge Protector

Just be sure to get one that works with your Rig.

14. A Water Pressure Flow Manager would be a good thing as well.  This limits the water pressure to your Rig to no more than 50 psi of water pressure in your RV’s plastic water pipe system.  Much more than that and you might start to blow water fittings.

Water Pressure Regulator
Water Pressure Regulator With Meter

14.5 If you use a Water Hose Splitter, like number 3 above for cleaning out your RV sewer hose then you should have a water Back Flow Preventer like

Water Back Flow Preventer

This little unit attaches to the hose splitter and prevents and water hose connected to the open side of the hose splitter from leaking water back into the water source and contaminating it.  Like when you wash out the sewer hose or the spare hose falls into a puddle.

15. Often times people will suggest that you take boards with you to level the Rig in a campsite that is not level.  While boards may work they add weight and can absorb water when left on the ground during rain.  Here is an alternative.

RV Ramp/Leveler

16. You will not want to forget some RV Dog Bones.  These adapters change your electrical hookups from one type to another.  For example from 50amp to 30amp.  Why because the campground only has 30amps. Please read “RV Dog Bones What Are They and How Are They Used” further down in this Blog for more details.

Adapt 50amp Plug to 30amp Plug

17. You should also carry a water hose for everything but drinking.  Wash the kids feet, flush the sewer hose, etc.  You get the picture.

General Duty Water Hose

18. You should also have a spray bottle of disinfectant to use on park water taps.

Spray Disinfectant

Feel free to add your Can’t Be Left Behind” items to the comments area.

Until next time.


And finally, please remember that this blog is an Amazon affiliate. When you order something through the Amazon links, it doesn’t add anything to your cost, but I do earn a small commission on everything you buy. Just click on an Amazon link, then shop as usual.

google.com, pub-5508606245748400, DIRECT, f08c47fec0942fa0

Keep Track Of Your Tire Pressure And Temperature

I read all the time that one of the biggest fears people have when RVing is a blown tire and the massive amount of damage that it can cause.  But I rarely read about a Fulltimer or a Newbie adding or adjusting a Tire Pressure Monitoring System (TPMS).  Why?  I doubt that every RV sold comes with a tire monitoring system. I just got back from one of the big RV shows and not one 5th wheel that I looked at came with a TPMS nor did a single salesman recommend a tire monitoring system during the sales presentation.  I also read that more than 60% of the RVs on the road today are overloaded or worse that the tire pressure on the RV is below the manufacturer’s recommended tire pressure.  To make it worse [if that is possible] many of the  RVs going down the highway, are going at  70 mph or higher. Even though the RV’s tires are marked not to exceed 65 mph.  As we get our RVs ready for another season of camping, let’s look at what we need to do to be safer going down the road and monitoring our tires.  


1. 

You need to check the tire pressure when the tire is still cold

It has been shown, by an  infrared thermometer, that after only 10 minutes of Summer Sun, that the temperature of RV tires have risen above COLD and should not be measured for pressure and thought to be cold.  After you have driven 1 mile the RV tires are not considered cold and should not be tested for pressure as being cold. 


2.

When you stop for gas or a bathroom break, you should do a tire check of the RV as well as the tow vehicle. My daughter was checking the tow vehicle for me and found a large cut in the sidewall of the truck tire.  We were able to get the tire replaced before the large accident occurred.  I did not even remember hitting or running over anything on the highway.


3.

Before starting out on the RVing trip be sure to carefully look at the tread, and the side walls both on the front and the back of the tire.  Most RV tire experts agree that if your RV tires are more than five years old from the date of manufacture [shown in a code on the tire] you should replace them. 


4.

Most tire failures occur when the side wall of the tire is under inflated or rots out from the inside where you can not see. Remember you are riding on air, the tire just keeps the air captured and held in place.  You can thank Mr. Sun for sidewall failure in some cases.  Most tires have a Mr. Sun inhibitor built-in but when a tire sits and sits the inhibitor does not get moved to the outside of the tire by the tire going round and round.  Now you see why you need wheel covers right? Trailer Wheel Covers   for less than $25. 


OK, I have exposed you to some of the basic safety things you need to do, now let’s look at those Tire Pressure Monitoring Systems.

A good system for monitoring your tire pressure as well as the tire temperature is the  Wireless Tire Pressure Monitoring System .

Wireless Tire Pressure Monitoring System


The system will tell you of an overheated tire, in most cases before it blows, and of course tell you of low pressure in any monitored tire, even the spare, in real time. 

  • Monitors up to 22 wheels (0-232 psi)
  •  Quickly reacts to abnormal pressure or temperature
  • Waterproof & Dustproof sensors; 
  • Customizable Tire Pressure Monitoring Criteria
  • Sensor Alarm system included; Locking Ring to Guard Against Theft
  • For use in RVs, SUVs, Caravans, Trucks, & Passenger cars

RV Flow-Through 6 Tire Sensor – Tire Pressure  Monitoring System (TPMS)


RV Flow-Through 6 Tire Sensor – Tire Pressure Monitoring System (TPMS)

  • The flow-through sensor with replaceable battery can be secured to prevent loss or theft
  • Portable monitor has rechargeable battery and monitors tire pressure 0-199 PSI & temperature
  • Monitor tires 24/7: low/high pressure, high temperature, and slow leaks.
  • Monitor warning thresholds are user adjustable; low-pressure alert level is per axle adjustable.
  • Tire sensor signals have excellent range and not require signal booster for most vehicles


As a lower cost alternative, you can use a screw-on tire pressure indicator, such as Quick-Pressure-PSI-50-Monitor, which at a glance can tell you that you may have a problem [use only if your tires are supposed to have 50 lbs of air when cold. Other pressures are available]  and the traditional pencil like gauge, such as Pencil-Pressure Gage .  

A low-cost way to check the tire and the tire hub temperatures is to use a non-contact  Infrared temperature gun.  Such as the HDE Non-Contact Infrared IR Temperature Gun Digital Thermometer

As you stop during your travels you can check the tire temperature and hub of each tire.  They should be with-in a few degrees of each other.  If you find a tire or hub that is very much higher than the rest you should take action to find out why before you proceed.

The first thing you should do is to check the air pressure of the tire that is over heating.  I know that you have been traveling awhile but the pressure in the HOT tire should be with-in a few pounds of the rest of the tires on the rig.  You might want to consider a digital tire pressure gauge such as the NorthONE Digital Tire Pressure Gauge.

NorthONE Digital Tire Pressure Gauge

Just be sure that the gauge you buy can read pressures above those that your tire is supposed to have in it.

To protect the tires in storage from Mr. Sun and any other nasties that come along.  You can also use an RV tire protective spray which is applied, as directed, to the tire side wall that is exposed to the sun.

I have used RV Tire Protection Spray with good luck.  This spray is not designed to make the tire side wall shinier, it is not a decorative spray, but something that is designed to put back into the surface of the rubber what Mr. Sun is taking out.

RV Tire Protection Spray

Also, note, that if you are going to store the RV for an extended period of time you should protect the tread of the tire from the surface that the tires are sitting on.  Nasty things can leach out of your tires into the blacktop or concrete that your RV sits on while being stored. Or from the blacktop or concrete into your tires during storage.  You can use an  Office Chair Carpet Protector 

as a way to protect your tires during storage.  It is an inexpensive solution to tire protection during storage.

I hope this better explains why it is important to know what is going on with your tires and also helps with the fear factor.


Until next time.


And finally, please remember that this blog is an Amazon affiliate. When you order something through any of the Amazon links, it doesn’t add anything to your cost, but I do earn a small commission on everything you buy. Just click on an Amazon link, then shop as usual.

Campfire Safety

As we all get ready to start camping or have already started.  I am reminded that in many parts of the USA you can not have a campfire do to outdoor burning restrictions.  So many of us remember the nights spent by the fire watching the sparks work their way up into the air from the burning logs and hearing the original snap, crackle, and pop. (sorry Kellogg)  Well, things have changed that’s for sure.  First in many states now you can not bring firewood from one state to another or even from one part of a state to another do to bugs, worms, and what have you.  You must use the firewood that is at the park store or Ranger station.

How far is too far to move firewood? And what is meant by “local” firewood?  When discussing local firewood, I am referring to the closest convenient source of wood that you can find. That might be from down the street, or a state forest in your county. As a general rule of thumb, 50 miles is too far to move firewood, and 10 miles or less is the max firewood should be moved.  In many, states there are rules, regulations, and quarantines that clearly state how far is too far. Always acquaint yourself with local rules and regulations when transporting firewood from one jurisdiction to another.  Find out more here Don’t Move Firewood .

So you buy some firewood from the Ranger’s supply at the park and you can burn it during the time you are in the park but you should leave what you do not burn behind.

You have firewood from the local area and you have piled it up in the fire pit and you get ready to light it, but how do you get the green wood, high in moisture content, to burn without dumping a bottle of charcoal starter one it.  One fun idea is to use to get the wood burning is InstaFire .

InstaFire Fire Starter

These little fire starter pouches can get a fire going almost anywhere and burn hot enough to get not so great firewood started.

How can you make a campfire fun and exciting?  Well, S’mores are fun to make S’mores.

When you are done making the S’mores you might want to be amazed by the camp fire northern light show.  Camp Fire Northern Light Show .

Now sit back and enjoy the rest of the evening and watch the light show from your camp fire.

What happens when you can not burn wood but you still want to sit around a campfire.  Well, the solution for that is the gas campfire.  Most RV camping areas do not have a problem with the gas campfire even if there is a burn ban because the fire does not give off sparks and with the turn of the gas valve, the fire is off.  You can still make those S’mores the kids want and you can still enjoy sitting outside of the RV around the campfire.  See Portable Gas Campfire for what I am talking about.

This portable gas campfire runs off of LP gas either the little 1lb green cylinders (runs for 2hrs) or the 10lb gas tanks.  It runs for hours and the red cover is used for storage and to elevate the gas campfire off the ground.  Also, the red cover has the carry handle attached.  With an extra accessory, you can even cook on the campfire just like a fire log one.

With any fire outside you need to have a fire extinguisher at the ready just in case.  Not just for grass fires. Fire Gone White/Red Fire Extinguisher – 16 oz

Until next time.

Don’t forget to join the Weekend RVers group on Facebook a no DRAMA place with Hints, Tips, Free Stuff, Recipes, for every kind of RVer.


And finally, please remember that this blog is an Amazon affiliate. When you order something through any of the Amazon links, it doesn’t add anything to your cost, but I do earn a small commission on everything you buy. Just click on an Amazon link, then shop as usual.

Fire, Smoke, Gas, Oh My

Did you know that there is a date code on the smoke detector as well as your carbon monoxide detector in your RV?  Did you know that the propane detector in your RV has an end of life?


I sure didn’t know.  If you are just changing the detector batteries at the beginning of each RV season and removing the batteries at the end of each season you may not be doing everything you  need to be safe, there is more to it.  When was the last time you tested all your detectors to be sure that they all worked? (In many cases pushing the test button on the detector does not test the most important part of the detector, the sensor.)  Do you know how to test the detectors?  When is the last time you had a fire drill in your RV?

Let’s look for some answers.  On the back of every smoke detector, there is a date code.  You may have to hunt for it but it is there.

Beginning in 1999, Underwriters Laboratories (UL) required the manufacturing date code on the back of the device to be printed in plain English. This information may appear on the back of the device, on the face of the horn, in the battery compartment or on the top sensing chamber.

It is widely held in the RV industry that if your detector is more than five years old, or is out of date, it should be replaced.

Some detectors have permanent batteries built-in and others need to be replaced annually.  Always use alkaline batteries when replacing batteries in detectors.  Alkaline batteries last the longest in low power usage situations, such as detectors.

Now let’s talk turkey.  Most RV manufacturers use the lowest cost, simplest smoke detector they can in their rigs.  So false alarms and the possibility of alarm failures are there.  What can you do, upgrade your standard smoke detector to a combination ionization and Photoelectric smoke particle alarm such as the

 Kidde Model Pi9010 Dual Sensing Smoke Detector

These alarms have fewer false alarms and will give you and your family more time to get out if there is an emergency.

Most fire safety experts agree that you have about 20 seconds to get out of an RV that is on fire before you will be overcome and not be able to get out.

Where should I put the smoke detectors in the RV you ask?  One should be in the Master bedroom and one in the Bunkhouse (if your RV has one).  Another one should be located in the kitchen area of the rig.
There is a new small size model smoke detector for use in storage bays or in areas where the size of the detector is important.

Photoelectric Smoke Detector

This type of small space detector is a great idea for storage areas where we may have cleaning chemicals and fire-starting chemicals and other stuff that in the right conditions can ignite and start a fire.

You can test smoke type detectors by using a burning candle near the detector and then blowing it out.  See what happens.  Also, you can push the button located on the detector to test the battery.
Pushing the button just test the battery and the electronics and does not check the sensor inside the unit.  The candle does that.

Next we have the Carbon Monoxide Detector.  This detector looks for the gas from combustion. CM gas is odorless, colorless, and tasteless.  This is a very deadly gas.  Every year there are deaths caused by CM gas when people run gasoline generators outside of their trailer. This detector can be located in the hallway to the bedrooms or in the bedroom itself.  Don’t forget to put one in the bunkhouse. The CMD should be located off the floor about head high or higher. In my rig, the detector is located on the ceiling. The CM gas is lighter than air and will be found near the ceiling first.  Here is the one that I have  Battery Operated Carbon-Monoxide Detector.

Battery Operated Carbon-Monoxide Detector

NOTE: Be sure to replace the batteries at the beginning of the RV season (remove batteries at the end of season) and keep the surface of the detector clean.

The LP Gas Detector is the last of the required detectors in your RV.  This one usually runs off of the 12-volt battery system of the RV.  It is located very near the floor usually in the hallway to the master bedroom, but not always.  This is the guy that will detect if you stove, oven, furnace, refrigerator, or any other LP gas product in the RV is leaking LP into your breathing space.  LP Gas is heavier than air and sinks to the floor and builds up from there.  It has a bad odor that has been added to the gas by the LP Gas provider.  So LP Gas is not odorless, you sure can smell it.  Unless of course you are sleeping.  If you smell gas get out, get out now, do not look for the leak just get out, and get help.

Here is a 12 volt LP Gas detector that has gotten good reviews and could replace what you are currently using if after testing yours does not work or the 5-year replacement date is up.  Remember pushing the test button on a detector does not test the sensor just the electronics and sounder.  Here is a detector that has gotten good reviews 12v LP Gas Detector.

12v LP Gas Detector

So how do you test one of these?  Remember those BIC lighters and Charcoal Starters?  Well get down near the detector and flick the BIC but do not light it.  Hold the lighter near the detector for a few seconds and you should set the alarm going.  Stop the flow of gas from the BIC and blow on the detector to dissipate the gas and the alarm should stop sounding.

A word of caution here I think is advisable.  I have heard that people are replacing the two gas detectors with one that claims it will do both jobs.  I would not want to bet my family’s safety on this all in one detector.  These gasses are not the same weight in the air one rises and one sinks, now how is one detector going to be in the right place to detect the right gas?  Just say’in.

Now let’s talk about firefighting.  Don’t do it.  Get Out!!!  If you must fight the fire to give yourself and your family more time to get out, do you have the right fire extinguisher?  Here again, in most cases, the cheapest fire extinguisher was installed in your rig.  When was the last time you check the extinguisher?  Now is a good time before you start off for this season.  If it is a powder type, turn it over a few times to resettle the powder.  If it is a squeeze the trigger type what is the date of manufacture?  You should plan on replacing the trigger type ever six years or sooner if the gauge says so.   RVers die every year from rig fires, use the fire extinguisher to give you and your family time to get OUT not to fight the fire.

You need a fire extinguisher in each bedroom, in the kitchen area, and at the front and back door of the RV and in the storage area.  You could also have one under the driver’s seat of the TV or Class A. I recommend using

Fire Gone

as the best you can get to give you more time.  If the kids are old enough be sure they can operate the Fire Gone and be sure to put one in the bunkhouse.

Because of recent fire events, the following fire suppression device was developed RV Refer Compartment Fire Suppression.

RV Refer Compartment Fire Suppression

Because of the number of fires that have been caused (or thought to have been caused) by refrigerators in RVs, an automatic fire suppression system has been developed, shown above.  This system is one the average RVer can install and will activate in the presence of a fire in the refrigerator compartment of an RV.  While you still need to get out as quickly as possible this unit may put the fire out completely or give you more time to, get out, either way, it is a plus.

OK, the fire drill.  Do you know how to get out of your Rig if the front door is blocked by fire?  In each bedroom area of the rig as well as other locations you will see a window with a red lever at the bottom.  With the word EMERGENCY EXIT printed on it.  Move the handle in the direction indicated and the window will open and you can climb out.  Of course, it will be a real job because you may have forgotten a few tools that will help make it easier.  First did you have your emergency window prop open stick?  If you said no, you should.  Take an old broom handle, rake handle, hunk of PVC, etc, and cut it to 24″ long and paint it red.  Attach two dots of hook and loop to the top and bottom of the stick and to the wall, alongside, or below the window and voila you are ready.  When the emergency occurs, open the window put in your prop stick and pull a blanket or comforter from the bed or a blanket from other area and lay it across the bottom of the window frame covering the exit handle area of the window.  This will stop you from being cut or badly scratched by the window frame as you crawl out.

Have a meeting place well outside of the rig area, that everyone knows and will meet at if there is a fire so you can take a head count and be sure everyone is safe.

Last but not the least.  Do the kids know how to get out?  Each season before you hit the road you should go over the fire safety rules and how to get out.

Rule number,

  1. GET OUT
  2. GET OUT
  3. NEVER FIGHT THE FIRE (you have approx 20sec to get out before you can’t)
  4. DO NOT GO BACK FOR THE DOG, CAT or GOLDFISH
  5. EVERYONE MEETS ACROSS THE ROAD

I am sure you get the picture.  Cats and dogs are part of the family for sure, but they are not humans and the kids and grandma are far more important.  Be sure to remind the kids of that.

Fire Safety Quick Check

  1. Test all Fire, LP Gas, and CM detectors
  2. Do not fight the fire GET OUT!!!!
  3. Know where the emergency exits are located
  4. Have an escape plan
  5. Have fire drills
  6. Be sure the fire extinguishers are up to date

Until next time

Don’t forget to join the Weekend RVers group on Facebook a no DRAMA place with Hints, Tips, Free Stuff, Recipes, for every kind of RVer.

And finally, please remember that this blog is an Amazon affiliate. When you order something through any of the Amazon links, it doesn’t add anything to your cost, but I do earn a small commission on everything you buy. Just click on an Amazon link, then shop as usual

911, What Is Your Emergency? — Water!!

Have you ever opened the Kitchen or Bathroom under sink cupboard doors only to find the contents wet or a bit damp?  To make  matters worse, you are dry camping (boon docking) and have no one around to ask what to do.  Well, wonder no more just keep reading to find out.

First you need to find the source of the leak.  This could be from water seeping around the top of the sink and draining inside the cupboard.  This is a simple and quick fix. Just use some Kitchen and Bath approved caulk, such as,

Kitchen and Bath Caulk

Follow the instructions on the tube and that water seepage should be a thing of the past.  I keep a tube of this product in white and clear in the RV all the time because you just never know.  But, what if that is not the problem?

Next check all the black sewer pipes to be sure the fittings are good and tight.  The black drain pipe fittings should be hand tight not wrench tight.  Do be careful not to over tighten these fittings as you can break the pipe or strip out the plastic threads on the pipes.  I check these fittings every time in the Spring before the first camping trip and several more times during the year to be sure they are tight and doing just fine.  I did find a loose one in the Master Bathroom last year.  So all the black pipe fittings are tight and you still find water and things damp.  Now, what?

Well, there is really only one thing left.  The hot and cold water fittings.

From the picture above you can see the red (hot) and, in this case, the white (cold) water lines as well as the black plastic sewer pipes. Getting a bit closer, we see where the problem is.

The metal clip that holds the screw on connector has come a bit loose and the water is dripping out from that fitting on to the stuff under the sink.  It is not a flood but a constant drip.  This scenario is not good for lots of reasons and needs to be taken care of right now.  If you do not have the PEX crimping tool you will never get the metal squeezed tight enough to stop the slow leak.

There is a quick and sure-fire way to fix this problem and end up with a far better connection than what the RV manufacturer used.  It is called a Shark Bite connector.

Shark Bite Push-on Connector

This is a push-on type of connector for the plastic hose and does not need any special soldering or tool to install.  You just cut off the leaking end and push on the Shark Bite.  Screw the female end to the faucet and you are good to go.

Please note to double check that after you cut off the old leaking connection, that you will still have enough plastic pipe to reach back to the faucet once you put on the Shark Bite.  The plastic pipe used in most RVs is 1/2″ and the Shark Bite Connector you will need is the 1/2″ type.  This connector is available in most hardware stores and the Big Box retailers of plumbing supplies. The packaging looks like below.

The package and product at my big box retailer was not hanging just stuffed  into a box on the shelf so I had to look a bit for it.

So here is what I ended up with.

You can see on the red plastic pipe what I had before the switch and you can see by the white pipe what I have now.  My plan is to change over the red pipe connector to a Shark Bite type to ensure no more future leaks from this area.

Here is a convenience add-on that I bought, just to help in replacing future connections with Shark Bite.  It is called the Shark Bite Deburring Tool. After cutting the old fitting off the PEX plastic pipe, you use this tool to deburr the pipe and the tool shows you how much of the plastic pipe you have to push into the Shark Bite connector to make a good water tight seal.

Shark Bite Deburring Tool

Again this tool is not mandatory.  It is just a nice convenience tool to have around.  One last tool you might want to pick up is the PEX plastic pipe cutting tool.  Again not a mandatory tool to have just a nice tool to have.

PEX Plastic Pipe Cutting Tool

Well, that is it.  If you have a water leak anywhere even a constant drip you need to fix it fast and the Shark Bite pipe fitting system is the fastest and easiest system I know of.  I keep a couple around because you just never know when you will need them and the cost is cheap insurance against a faucet connection leaking and damaging the rig.

I would like to thank Michael Cook who’s Facebook posting gave me the idea for this post.

Until next time.

Don’t forget to join the Weekend RVers group on Facebook a no DRAMA place with Hints, Tips, Free Stuff, Recipes, for every kind of RVer.

And finally, please remember that this blog is an Amazon affiliate. When you order something through any of the Amazon links, it doesn’t add anything to your cost, but I do earn a small commission on everything you buy. Just click on an Amazon link, then shop as usual.

How To Stay Warm In Your RV

A lot has been said about how to keep your RV warm in the colder months so pipes don’t freeze, sewer lines flow, and water comes out of the faucet.  But very little time has been devoted to discussing how to keep yourself warm and cozy. Let’s take a minute to discuss that part of RVing.

I suppose many of you would say just turn up the heat and use more propane or add a fireplace to the RV if you do not already have one.  Maybe just add a BIG space heater.  Well, while those are good ideas you may have forgotten warmer air holds more moisture and adds to Mold growth.  Mold and moisture entering the walls of an RV are the death of the RV.  Most of us have a real investment to protect so raising the inside temperature is not always a good idea.

I suppose one way to keep warm is layering clothes but how many layers do you want on, just to read a book or watch TV? If you set the furnance to 69 or 70 degrees to keep air moiture down you will get cold in the feet and outer parts of the body. So you need to put on some socks and add some Snoozies to your feet

Snozzies To Keep Your Feet Warm

Polyester

Made with a brushed fleece exterior in colorful and fun printed patterns and then lined with a soft Sherpa fleece inside.

Non-skid sole so you can feel safe wearing them on wood or tile floors.

S (5-6), M (7-8), L (9-10), XL (11-12).

Keeps feet warm even on the coldest of days.

Many patterns to choose from.

Now that we have the feet warm we need to get the rest of the body warm.

Sunbeam Fleece Heated Throw Electric Blanket

This type of blanket heats just you and not the whole RV which saves on electric cost.

You say your ears are cold.  Then let’s look into solving that problem.

Personal Heater

Self-Regulating Ceramic Element

Automatic Overheat Protection

Maximum Heat Power: 1.50 kW

Lower power usage saves on your energy bill and helps to eliminate tripping the circuit breaker if multiple heaters are used in an RV setting.

Energy-Smart, uses only 200 Watts

3.8″ x 4.3″ x 6.1″ tall. Fully assembled.

ETL listed

Safe ceramic element, overheat protection, and cool-touch housing.

This type of heater does not heat the whole RV just you.  That will save the bucks.  This is a personal heater and can be used at bedtime as well to heat you while you sleep.

What if you read in bed under the covers and, of course, the bed is cold when you get into it and anytime you would move your feet you would freeze.  What to do?

Heated Mattress Pad

A heated mattress pad sends heat up through the sheets to you rather than down through the blankets to you. So it uses your own body heat as well as its’ own heat to keep you warm and cozy.  If you move your feet they are still warm as the heat from the pad rises.  This is a very efficient system and the cost of operating the Heated Mattress Pad is also very low.

You turn of the mattress pad about 15 minutes before going to bed for a warm reception when you crawl in.

You could add a pair of nighttime Sweats to your wardrobe and put them on during the evening hours to help keep you warm.  There are hundreds of styles and as many prices for this type of clothing and you can even shop online to save a buck or two on gas.

Until Next Time

Don’t forget to join the Weekend RVers on Facebook a no DRAMA place with Hints, Tips, Free Stuff, Recipes, for every kind of RVer.


And finally, please remember that this blog is an Amazon affiliate. When you order something through any of the Amazon links, it doesn’t add anything to your cost, but I do earn a small commission on everything you buy. Just click on a link, then shop as usual.

Last Minute RVer Gifts

Well, there is less than one week to go until Christmas so for those of you that still can’t figure out a good gift for your RVing friends here are my last ideas on the subject for this year.

16QT Countertop Oven

16-quart countertop oven bakes, boils, broils, air fries, steams, grills, and roasts

Cooks up to 3 times faster than a conventional oven; no need to defrost frozen foods first

Uses halogen, infrared, and convection heat; food stays moist on the inside and browned and crispy on the outside

Adjustable temperature; 60-minute timer; stay-cool handles; 2 stainless-steel cooking racks included

Measures approximately 15-4/5 by 13 by 12-1/2 inches; 1-year limited warranty

Pops faster than a microwave- up to 18 cups of gourmet corn in less than 2 1/2 minutes

In test after test, the Presto PopLite hot air popper out popped other leading brands, popping up to 30-percent faster with virtually no unpopped kernels

Uses regular or gourmet popcorn

Pops without oil for up to 42-percent fewer calories than microwave bag popcorn.,

Trademark Tools 75-RB680 Red 12 Volt Automobile Electric Blanket

It has an LED indicator light

It can be plugged for use with any 12 Volt power outlet (cigarette lighter socket)

It automatically maintains a warm comfortable temperature

It comes in a plastic storage case with handles

The electric blanket measures 43 x 59 inches

Single Serve Coffeemaker

Brew using single-serve packs, coffee grounds or soft pods

Compatible with K-cup packs

Better coffee extraction than the leading competitor

Adjustable cup rest allows for standard-size cups or travel mugs

All removable parts are dishwasher safe

Igloo Countertop Ice Maker, Stainless Steel

Portable Stainless Steel Ice Maker

Enjoy a batch of ice in as little as 6 minutes

Produces 26 lbs of ice per day in choice of 2 ice sizes (small or large)

Stores up to 1.5 lbs of ice at a time

2.3 Quart Reservoir with Electronic LED Controls

Pizzacraft 15″ Square Cordierite Baking/Pizza Stone

Make your own delicious pizza at home

Reheat ready-made frozen pizza

Not just for pizza can bake bread, pastries and other goods

Stone requires no seasoning or conditioning

Thermal shock resistant

Flameless Candles Illumination Set – Scented

BEST Quality Premium REAL Wax Flameless Candles – high quality authentic flickering flames candles

LED Light Technology – the battery operated candles will last you 500+ hours

SAFE – No Flame Candles which Look Natural – AA Candles Flickering Candle Set is environment-friendly, user-friendly, and hassle-free and hazard free candle decor

Great for both indoor & outdoor use

These are lightly Vanilla Scented

Stanley All-in-One Screwdriver

6-way all-in-one comfort grip screwdriver

6 tips include #1 and #2 Phillips, 1/4 and 3/16 slotted, and 1/4 and 5/16 nut driver

Ergonomically designed bi-material handle for superb comfort

Bar is chrome plated for rust resistance

Ideal for kitchen drawer or car–no need for extra screwdrivers

Caravan Sports Infinity Zero Gravity Chair, Beige

Durable textaline fabric suspended by double bungee system

Relax with the smooth recline function that locks in any position, adjustable headrest/lumbar support

Dual finger tip locking system

Folds down to only 6.3 inches wide

Supports up to 300 lbs.

High strength and durable powder coated steel frame

Long lasting outdoor grade fabric (Textilene 2X1)

Well, that is it for this Season.  Have a great Christmas and Happy Camping.

Don’t forget to join the Weekend RVers on Facebook a no DRAMA place with Hints, Tips, Free Stuff, Recipes, for every kind of RVer.

RV Stocking Stuffer Ideas From Facebook

I am sure most of us have gotten the big RVer Christmas Gift for this year and just need a few odds and ends to fill in.  If that is the case and you need some small RVer gift ideas here are a few that have been suggested by people on Facebook.

A. First is smoke and fire alarms for the basement storage of a TT or 5th wheel.  Are you protected in those areas?  I wasn’t but I am now.

Smoke and Fire Alarm

B. Next is a product that is used to replace that foam filter stuff that you find when you clean the Air Conditioner cover.  You don’t do that?  Never knew that there was a filter behind the ceiling A/C grate. Well now you do.

You will need to cut the filter material to match the current filter.

C. How about a protectant that you can spray on just about anything on a RV to protect it from Sun and weather.

Regular use gives 100% prevention of UV caused slow-fade

303 Aerospace protectant keeps UV-sensitive materials “like new” year after year.

D. When you have a squeak what do you use to get rid of it? When something is hard to turn what do you use to free it up?  You should not be using WD-40. You should be using.

Contains PTFE for long-lasting protection

Withstands extreme load carrying situations

Displaces moisture and seals out corrosion

E. For those black tank watchers.

ODOR FREE: absolutely no chemical or sewer smell

ORGANIC: biodegradable, environmentally friendly, septic tank friendly

EFFECTIVE: in extreme hot & cold temperatures ( over 100°f )

EXTENDED DUMP INTERVAL: keeps on working ( don’t have to add more before dumping )

LIQUIFY: waste solids & most ordinary household tissue ( no expensive special tissue needed )

F. To repair a tire on the road or dry camping you need one of these Tire Repair Kits.

Tire Repair Kit

G. When you need to wash off your tow vehicle the front of the RV and you don’t have or can’t use any water.

Can be used as Waterless Wash or Just spray on after wet washing to Wax As You Dry. Works on wet or dry surfaces. Kit includes 1 full 32oz spray bottle , 1 mini bug scrubber and 3 Microfiber towels. Waterless Wash up to 8 cars or Wax As You Dry 12 cars. Leaves a non-stick UV protective coating on ALL surfaces

H. To keep things frozen while going to your campground try this.

Nu-Ice Freezer Pack

Nu-Ice is a non-toxic, non-hazardous, chemical freezer pack capable of maintaining a sub-zero temperature “charge” in a freezer or other insulated environment for an extended period of time. This is accomplished by charging the pack to initiate the simple chemical reaction within the pack. The pack immediately begins to absorb energy (heat) and emit sub-zero temperatures once environment temperatures begin to rise. These packs are safe, environmentally friendly and re-usable up to five years! Therefore, the Nu-Ice packs are a great alternative for gas emitting dry ice as our pack do not require special handling, training or costly haz-mat shipping fees. 5 lb.

I. With all the rubber weather seals our RVs have we need a rubber protectant.

Rubber Seal Protectant

Gummi Pflege is a special rubber treatment that conditions rubber weather seals on car doors, windows and trunks reducing squeaks, rattles, wind noise and potential water leaks. Gummi restores color to dried out rubber and keeps them elastic while protecting them against the damaging effects of heat, freezing temperatures and UV rays. It uses a petroleum free, water-based formula. Easy-to-use shoe polish type applicator makes application simple without the mess.

J. To dry you off quickly and then dry itself quickly you need a special quick drying towel.

Quick Drying Towel

Microfiber with super soft ultra-suede finish

Remarkably absorbent and fast drying. Machine washable

Features a silver-ion antibacterial treatment. The microfibers are given a permanent coating of silver ions, which prohibit the growth of bacteria and other microbial life. The result is a towel that doesn’t smell or transmit germs

Packaged in Mesh Bag

Sizes XS: 12″ x 24″, 1.3 oz; SM: 16″ x 32″, 2.2 oz; MD: 20″ x 40″, 3.6 oz; LG: 24″ x 48″, 5.1 oz; XL: 30″ x 60″, 8.1 oz

K. How about a nice flag or turn it into a picture to hang in the RV?

Just Go Flag

L. All most every RVer that I know likes Donuts.  With below you can make your own fresh daily.

Pan makes 6 standard donuts at a time, each 3.5 inches/9cm diameter

Durable nonstick coating helps ensure effortless food release

Recipes and instructions included

Hand washing recommended

Until Next Time.

Don’t forget to join the Weekend RVers on Facebook a no DRAMA place with Hints, Tips, Free Stuff, Recipes, for every kind of RVer.

Top 10 Most Requested RVer Gifts

Here is a list of the Top 10 Most Requested Gifts, that RVers are asking for on Facebook.  I sure hope I get some of these for the 2016 camping season.

10. The Cuisinart Griddler Gourmet.

Cuisinart Griddler Gourmet
  • Multiple cooking options: One set of reversible nonstick plates – Grill and Griddle
  • Open it to use as regular grill or griddle. Close it and it’s a panini press or contact grill
  • Extra-large, nonstick grill plates and griddle plates let you cook more servings of a wide variety of foods in less time.
  • Pop-out plates are easy to remove and dishwasher-safe. Housing wipes clean with a damp cloth
  • Includes: scraper for cleaning frill and griddle plates, two removable drip cups, and instruction/recipe book.
BBQ Accessory Organizer
  • The BBQ Accessory Organizer will have you cooking like a pro with all your accessories grill-side and close at hand.
  • Features four double-sided hooks for holding your most important barbecue tools.
  • Includes a mounted paper towel holder, a must have when grilling up your favorite messy sauce or marinated recipes.
  • Attached shelf to hold spices, food, and all your cooking gadgets; shelf also functions as a cover for the paper towels against the weather.
  • Large 3-1/2-Inch screw clamp mounts to any grill or table; made of painted steel for strength and durability.
Gerber Multi-Tool
  • Suspension Multi-Plier multi-tool with 12 integrated components
  • Saf.T.Plus component locking system guarantees safety
  • Lightweight open-frame stainless steel handle
  • Includes a ballistic nylon sheath
  • Weighs 9.6 oz; Closed Length: 4 inches; limited lifetime warranty.
RV Heated Hose

  • Thermostatically controlled2
  • Solid brass couplings.
  • Quality, double walled hose.
  • Turns itself off during warmer weather.
  • MET Listed
Heavy Duty X-Chocks
  • Provides added stabilization and prevents tire shifts by applying opposing force to tandem, tire applications.
  • As opposed to other chocks, the X-Chock works with the tires natural movement instead of against them.
  • Rust inhibitive coating.
  • Plated ratchet wrench with comfort bumper included.
  • Lightweight and easy to store.
Anderson Levelers

4. Hand Operated Can Opener (GOOD One)

Hand Operated Can Opener
  • Manual can opener safely and efficiently opens cans of all sizes.
  • Powerful stainless-steel cutting mechanism; ergonomic rubberized handles.
  • Magnetic lid lifter eliminates handling sharp edges and releases lids with the touch of a button.
  • Hinged design opens wide for easy cleanup by hand; compact size stores efficiently.
  • Measures approximately 7 by 2 by 3 inches; 5-year limited warranty.
Oxygenics Shower Head
  • Put jet engine power in your shower with this attractive handheld shower head.
  • Patented technology increases oxygen content in your water and self-pressurizes for the best shower experience possible.
  • Comfort control adjusts from soft to stimulating.
  • No clogging guaranteed. Includes wand, 60 inch hose, wand holder, comfort regulator, washers, teflon tape and easy installation instructions.
  • Limited lifetime warranty. Oxygenics BodySpa Kit has shutoff valve; water-saving, self-pressurizing, handheld shower, WaterSense 2.0 GPM, White or Brushed Nickel.
Portable Ice Maker
  • Convenient, compact design is ideal for use in small kitchens & other compact spaces like RVs, boats & more.
  • Produces 26 pounds of ice a day – never run to the store for a bag of ice again.
  • Offers an easy-to-use LED control panel that allows you to choose from 2 ice size settings.
  • Portable ice maker requires no installation – just plug in unit, add water & wait up to 15 minutes to enjoy fresh ice.
  • Flawless design boasts an excellent reputation, offering consistent & dependable ice production that has been continually perfected.

And the number one request RVer Christmas Give this year is……………..

1. The  Hamilton Beach Single Serve Coffee Maker

  • Brew using single-serve packs, coffee grounds or soft pods
  • Compatible with K-cup packs
  • Better coffee extraction than the leading competitor
  • Adjustable cup rest allows for standard-size cups or travel mugs
  • All removable parts are dishwasher safe

Here is a couple more items that just missed the Top 10 but are just great gift items for the RVer in your family.

NuWave Induction Burner 2
  • The PIC2 has 6 different pre-programmed temperature settings, but has the flexibility to cook at 52 different temperatures between 100F and 575F, adjustable in 10-degree increments.
  • The PIC2 is equipped with programmable stage cooking functionality with up to 100 hours of program memory and performance.
  • Versatility to boil, simmer, deep-fry, stir-fry, saute, steam and sear, slow cook, barbecue, melt and grill.
  • Uses up to 70% less energy than conventional gas or electric ranges. Lightweight and portable.
  • The PIC2 boasts state-of-the-art safety features such as automatic shut-off when an induction-ready pan, (pan sold separately) is removed from base.

B. Halogen, Infrared & Convection Oven

Halogen, Infrared & Convection Oven
  • 16-quart countertop oven bakes, boils, broils, air fries, steams, grills, and roasts.
  • Cooks up to 3 times faster than a conventional oven; no need to defrost frozen foods first.
  • Uses halogen, infrared, and convection heat; food stays moist on the inside and browned and crispy on the outside.
  • Adjustable temperature; 60-minute timer; stay-cool handles; 2 stainless-steel cooking racks included.
  • Measures approximately 15-4/5 by 13 by 12-1/2 inches; 1-year limited warranty.


C. Cordless Ultra-Compact Vacuum Cleaner

Cordless Ultra-Compact Vacuum Cleaner
  •  Ultra-compact, cordless vacuum cleaner with high-performance motor.
  • 4-foot flexible hose, long crevice tool, nozzle/brush tool, and pet-hair cleaning tool.
  • 3-stage filtration system for clean air exhaust; easy-empty dirt canister.
  • Charger, storage caddy, and dishwasher-safe filter included; Energy Star approved.
  • Measures approximately 12-1/5 by 6-2/5 by 10 inches; 2-year warranty.

Well, there it is the Top 10 most requested Holiday Gift items currently on the RV Facebook pages.  

Until Next Time