Campfire Safety

As we all get ready to start camping or have already started.  I am reminded that in many parts of the USA you can not have a campfire do to outdoor burning restrictions.  So many of us remember the nights spent by the fire watching the sparks work their way up into the air from the burning logs and hearing the original snap, crackle, and pop. (sorry Kellogg)  Well, things have changed that’s for sure.  First in many states now you can not bring firewood from one state to another or even from one part of a state to another do to bugs, worms, and what have you.  You must use the firewood that is at the park store or Ranger station.

How far is too far to move firewood? And what is meant by “local” firewood?  When discussing local firewood, I am referring to the closest convenient source of wood that you can find. That might be from down the street, or a state forest in your county. As a general rule of thumb, 50 miles is too far to move firewood, and 10 miles or less is the max firewood should be moved.  In many, states there are rules, regulations, and quarantines that clearly state how far is too far. Always acquaint yourself with local rules and regulations when transporting firewood from one jurisdiction to another.  Find out more here Don’t Move Firewood .

So you buy some firewood from the Ranger’s supply at the park and you can burn it during the time you are in the park but you should leave what you do not burn behind.

You have firewood from the local area and you have piled it up in the fire pit and you get ready to light it, but how do you get the green wood, high in moisture content, to burn without dumping a bottle of charcoal starter one it.  One fun idea is to use to get the wood burning is InstaFire .

InstaFire Fire Starter

These little fire starter pouches can get a fire going almost anywhere and burn hot enough to get not so great firewood started.

How can you make a campfire fun and exciting?  Well, S’mores are fun to make S’mores.

When you are done making the S’mores you might want to be amazed by the camp fire northern light show.  Camp Fire Northern Light Show .

Now sit back and enjoy the rest of the evening and watch the light show from your camp fire.

What happens when you can not burn wood but you still want to sit around a campfire.  Well, the solution for that is the gas campfire.  Most RV camping areas do not have a problem with the gas campfire even if there is a burn ban because the fire does not give off sparks and with the turn of the gas valve, the fire is off.  You can still make those S’mores the kids want and you can still enjoy sitting outside of the RV around the campfire.  See Portable Gas Campfire for what I am talking about.

This portable gas campfire runs off of LP gas either the little 1lb green cylinders (runs for 2hrs) or the 10lb gas tanks.  It runs for hours and the red cover is used for storage and to elevate the gas campfire off the ground.  Also, the red cover has the carry handle attached.  With an extra accessory, you can even cook on the campfire just like a fire log one.

With any fire outside you need to have a fire extinguisher at the ready just in case.  Not just for grass fires. Fire Gone White/Red Fire Extinguisher – 16 oz

Until next time.

Don’t forget to join the Weekend RVers group on Facebook a no DRAMA place with Hints, Tips, Free Stuff, Recipes, for every kind of RVer.


And finally, please remember that this blog is an Amazon affiliate. When you order something through any of the Amazon links, it doesn’t add anything to your cost, but I do earn a small commission on everything you buy. Just click on an Amazon link, then shop as usual.

RV Dog Bones and Adapters

Many times as you travel around the country you will find that you are in need of some sort of thingy that changes what you have into something you need.  This happens most often in the electrical side of your Rig.  If you have a 50 amp rig you may find the the campground you have only has 30 amp plug-ins.  Or you may want to plug in your power pedestal power analyzer into the 30 amp or 50 amp plug-in to be sure that it is safe you plug into your rig.

Let’s see what these things look like and what they are use for.  First the RV Dog Bone.

The typical RV Dog Bone is an electrical adapter that changes a 50 amp RV plug so that it can plug into the 30 amp socket of a power pedestal. The 30 Amp Male to 50 Amp Female Dog Bone  looks like this;

30 Amp Male to 50 Amp Female Dog Bone  

Of course there maybe a time when you need to plug your 30 amp Rig power cable into a 50 amp power pedestal socket  The 50 amp Male to 30 amp Female Dog Bone looks like this;

 50 amp Male to 30 amp Female Dog Bone 

Plugging in you 30 amp RV into this adapter will not harm your Rig and will give you no more power that what you should have. The reason to do this is often the power socket on the power pedestal is worn or broken and the only good one is the one your power cord will not plug into.  These RV Power Dog Bones let you mix and match to get some power.

So you have stopped by Grandma’s house to spend a few days and you need a way to plug your RV into her outside power socket so you can get some lights and keep the fridge going.  What do you need well you need a 15 Amp Male plug to 30 amp Female plug . This little gadget is shown below.

                                                15 Amp Male plug to 30 amp Female plug

While these may not be all the ones you will ever need this group will get you started and cover most of the situations that you will find.  One last bit of information the industry does make Y connector so that you can get 15 amp sockets from both 50 amp and 30 amp outlets from the power pedestal.  I have shown one type below.  I do not use these myself because where I camp has always had 15 amp sockets to plug into if I need to have 15 amps at the power pedestal.  If you have a blow-up boat or kayak

you might need this type of Y Adapter with 50 Amp Male Plug To RV 30 Amp and 15/20 Amp Female Connector  Shown below is what it looks like;

Y Adapter with 50 Amp Male Plug To RV 30 Amp and 15/20 Amp Female Connector

The last thing I would like to cover is the pedestal power combiner.  These devices combine the power outlets of the power pedestal to give you more amps.  For example if you combine the power output of the 30 amp socket with the power output of the 15 amp socket on the power pedestal you would get 45 amps of power to work with.  Or at least that is the theory.  Again I do not use this type of device as my KZ Spree is only 30 amps.  But to be fair I am showing you the device. The 45 amp Power Maximizer  The unit is shown below;

The 45 amp Power Maximizer  

Click on the name of the item to learn more. 

Until next time,

Smoke, Fire, Gas Safety

Did you know that there is a date code on the smoke detector as well as your carbon monoxide detector in your RV?  Did you know that the propane detector in your RV has an end of life?

I sure didn’t know.  If you are just changing the detector batteries at the beginning of each RV season and removing the batteries at the end of each season you may not be doing everything you  need to be safe, there is more to it.  When was the last time you tested all your detectors to be sure that they all worked? (In many cases pushing the test button on the detector does not test the most important part of the detector, the sensor.)  Do you know how to test the detectors?  When is the last time you had a fire drill in your RV?

Let’s look for some answers.  On the back of every smoke detector there is a date code.  You may have to hunt for it but it is there.

Beginning in 1999, Underwriters Laboratories (UL) required the manufacturing date code on the back of the device to be printed in plain English. This information may appear on the back of the device, on the face of the horn, in the battery compartment or on the top sensing chamber.

It is widely held in the RV industry that if your detector is more than five years old, or is out of date, it should be replaced.

Some detectors have permanent batteries built-in and others need to be replaced annually.  Always use alkaline batteries when replacing batteries in detectors.  Alkaline batteries last the longest in low power usage situations, such as detectors.

Now let’s talk turkey.  Most RV manufactures use the lowest cost, simplest smoke detector they can in their rigs.  So false alarms and the possibility of alarm failures are there.  What can you do, upgrade your standard smoke detector to a combination ionization and Photoelectric smoke particle alarm such as the

Kidde Model Pi9010 Dual Sensing Smoke Detector .

These alarms have fewer false alarms and will give you and your family more time to get out if there is an emergency.

Most fire safety experts agree that you have about 20 seconds to get out of a RV that is on fire before you will be overcome and not be able to get out.

Where should I put the smoke detectors in the RV you ask?  One should be in the Master bedroom and one in the Bunkhouse (if your RV has one).  Another one should be located in the kitchen area of the rig.

You can test this type of detector by using a burning candle near the detector and then blowing it out.  See what happens.  Also you can push the button located on the detector to test the battery.  Pushing the button just test the battery and the electronics and does not check the sensor inside the unit.  The candle does that.

Next we have the Carbon Monoxide detector.  This detector looks for the gas from combustion. CM gas is odorless, colorless, and tasteless.  This is a very deadly gas.  Every year there are deaths caused by CM gas when people run gasoline generators outside of their trailer. This detector can be located in the hallway to the bedrooms or in the bedroom itself.  Don’t forget to put one in the bunkhouse. It should be located off the floor about head high or higher. In my rig the detector is located on the ceiling. The CM gas is lighter than air and will be found near the ceiling first.  Here is the one that I have  Battery Operated Carbon-Monoxide Detector.

Battery Operated Carbon-Monoxide Detector

Be sure to replace the batteries at the beginning of the RV season (remove batteries at the end of season) and keep the surface of the detector clean.

The LP Gas Detector is the last of the required detectors in your RV.  This one usually runs off of the 12volt battery system of the RV.  It is located very near the floor usually in the hallway to the master bedroom, but not always.  This is the guy that will detect if you stove, oven, furnace, refrigerator, or any other LP gas product in the RV is leaking LP into your breathing space.  LP Gas is heavier than air and sinks to the floor and builds up from there.  It has an bad odor that has been added to the gas by the LP Gas provider.  So LP Gas is not odorless, you sure can smell it.  Unless of course you are sleeping.  If you smell gas get out, get out now, do not look for the leak just get out, and get help.

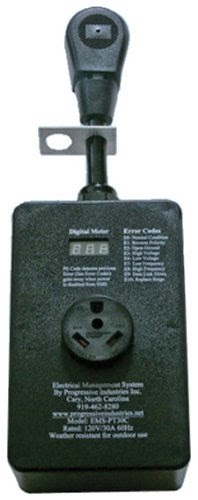
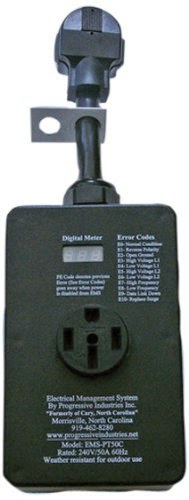
Here is a 12volt LP Gas detector that has gotten good reviews and could replace what you are currently using if after testing yours does not work or the 5 year replacement date is up.  Remember pushing the test button on a detector does not test the sensor just the electronics and sounder.  Here is a detector that has gotten good reviews 12v LP Gas Detector.

12v LP Gas Detector

So how do you test one of these?  Remember those BIC lighters and Charcoal Starters?  Well get down near the detector and flick the BIC but do not light it.  Hold the lighter near the detector for a few seconds and you should set the alarm going.  Stop the flow of gas from the BIC and blow on the detector to dissipate the gas and the alarm should stop sounding.

A word of caution here I think is advisable.  I have heard that people are replacing the two gas detectors with one that claims it will do both jobs.  I would not want to bet my family’s safety on this all in one detector.  These gases are not the same weight in the air one rises and one sinks, now how is one detector going to be in the right place to detect the right gas?  Just say’in.

Now lets talk about fire fighting.  Don’t do it.  Get Out!!!  If you must fight the fire to give yourself and your family more time to get out, do you have the right fire extinguisher?  Here again, in most cases, the cheapest fire extinguisher was installed in your rig.  When was the last time you check the extinguisher?  Now is good time before you start off for this season.  If it is a powder type, turn it over a few times to resettle the powder.  If it is a squeeze the trigger type what is the date of manufacture?  You should plan on replacing the trigger type ever six years or sooner if the gage says so.   RVers die every year from rig fires, use the fire extinguisher to give you and your family time to get OUT not to fight the fire.

You need a fire extinguisher in each bedroom, in the kitchen area, and at the front and back door of the RV.  I recommend using Fire Gone 2NBFG2704

Fire Gone 2NBFG2704

as the best you can get to give you more time.  If the kids are old enough be sure they can operate the Fire Gone and be sure to put one in the bunkhouse.

Because of recent fire events, the following fire suppression device was developed RV Refer Compartment Fire Suppression.

RV Refer Compartment Fire Suppression

Because of the number of fires that have been caused (or thought to have been caused) by refrigerators in RVs, a automatic fire suppression system has been developed, shown above.  This system is one the average RVer can install and will activate in the presents of a fire in the the refrigerator compartment of an RV.  While you still need to get out as quickly as possible this unit may put the fire out completely or give you more time to get out either way it is a plus.

OK the fire drill.  Do you know how to get out of your Rig if the front door is blocked by fire?  In each bedroom area of the rig as well as other locations you will see a window with a red leaver at the bottom.  With the word EMERGENCY EXIT printed on it.  Move the handle in the direction indicated and the window will open and you can climb out.  Of course it will be a real job because you may have forgot a few tools that will help make it easier.  First did you have your emergency window prop open stick?  If you said no, you should.  Take and old broom handle, rake handle, hunk of PVC, etc, and cut it to 24″ long and paint it red.  Attach two dots of hook and loop to the top and bottom of the stick and to the wall along side or below the window and voila you are ready.  When the emergency occurs open the window put in your prop stick and pull a blanket or comforter from the bed or a blanket from other area and lay it across the bottom of the window frame covering the exit handle area of the window.  This will stop you from being cut or badly scratched by the window frame as you crawl out.

Have a meeting place well outside of the rig area, that everyone knows and will meet at if there is a fire so you can take a head count and be sure everyone is safe.

Last but not the least.  Do the kids know how to get out?  Each season before you hit the road you should go over the fire safety rules and how to get out.

Rule number,

  1. GET OUT
  2. GET OUT
  3. NEVER FIGHT THE FIRE (you have approx 20sec to get out before you can’t)
  4. DO NOT GO BACK FOR THE DOG, CAT or GOLDFISH
  5. EVERYONE MEETS ACROSS THE ROAD

I am sure you get the picture.  Cats and dogs are part of the family for sure, but they are not humans and the kids and grandma are far more important.  Be sure to remind the kids of that.

Fire Safety Quick Check

  1. Test all Fire, LP Gas, and CM detectors
  2. Do not fight the fire GET OUT!!!!
  3. Know where the emergency exits are located
  4. Have an escape plan
  5. Have fire drills
  6. Be sure the fire extinguishers are up to date

Until next time

Do RVers Really Need A Power Monitor System?

I see that question all the time on Facebook and most of the Blogs that I read.  For the simple, easy, straight forward answer, YES you do.  There are so many factors involved here that I can not possibly cover them all in a single post but, I would like to cover the basics so that you can better understand why you need a Power Management system of some kind.

1. You need to know what the AC (Shore Power) voltage is inside your rig.  This is the power that indirectly powers lights, water heater, microwave, furnace, charger for the 12-volt battery system, etc.  If the voltage gets below 102 volts and should stay there for a few minutes it would be possible to sustain approximately $1200 of damage or more.

So what do you need?  You will need an AC Line Voltage Monitor.  The unit shown below is plugged into an AC wall outlet that you can see and will monitor what the line voltage is.  If it should go below 105 volts you need to unplug your rig from the outside power pedestal until the voltage goes back to normal.

AC Line Voltage Monitor

So how do you know when the outside power pedestal is back to normal.  You plug the Voltage Monitor into the 125 volts two pin socket in the power pedestal and see what the monitor reads.  It should read 110 volts or higher up to 125 volts.  The same caution goes for overvoltage.  You should unplug the rig form the power pedestal if your Voltage Monitor begins to read over 122 Volts.  Plug the Voltage Monitor into the power pedestal and watch for the voltage to drop to below 122 Volts.

Could this monitoring of the voltage be done for less money?  Yes, by using a cheap Digital Volt Meter  pictured below;

 Digital Volt Meter

You could plug the test leads that come with the meter into the meter and then the other ends of the test lead into the slots on the AC wall socket. (Caution do not leave unattended) Or you could make up a cord from a 6-foot extension cord and the test leads that come with the meter.  See below for an example.

AC Cord With Test Meter Leads

2. Next is  The Polarity Tester.  This is used to be sure that the Neutral wire of the power line is not reversed with the positive lead of the power line.  If that were to happen you could have what is called a hot skin condition.  Meaning that if you had an aluminum skinned rig you could receive quite a shock from your rig.

 The Polarity Tester

The Polarity Tester can also tell you if the Earth Ground (the bare copper wire) is hooked up properly.  

The Earth Ground is a separate conductor which may seem to be doing nothing but, is, in fact, a protective wire. It is there, ready to take the current away to earth ground, from the body or frame of the electrical device it is connected to, makes contact with any “hot” wire. [the 120 volts mains power is carried in two current carrying conductors called “hot” and “neutral”.] 
So, IF one of the “hot” conductors should contact the metal frame of the rig or housing of an appliance, perhaps because the appliance got damaged by being dropped from a table, or similar accident,  the third wire which is the earth ground wire, which runs directly from the housing to the grounding [or earth ground bus] in the fuse or breaker panel, will in effect cause a short circuit which should blow the fuse or trip the breaker. 
This third wire also guarantees a current path back to the electrical panel where the fuse or circuit breaker protecting that circuit is located, in the event that the hot wire should come in contact with the rig frame, but the neutral conductor should happen to have been cut or damage and become disconnected, or open. 
The idea is to guarantee that if a part of the rig, device or appliance should become “hot,” which could be fatal to anyone who then came into contact with it. That the earth ground would trip/open the circuit protection device [fuse or breaker], and turn off the flow of AC current. 

To help further in checking for unwanted or wanted electricity a good investment is the Voltage Sensor which is shown below;

 Voltage Sensor

With this probe, you do not need to touch the power line to tell if there is voltage present.  You can use this probe to find power lines behind the wall or under the floor of the Rig as well as the towing vehicle.

3.  Often times you want to know or need to know how much power something uses, especially if you keep popping a breaker or the power pedestal. The solution is Kill-A-Watt.  The unit shown below can be used to show how much power an appliance, tool, or piece of electronics is using.

 Kill-A-Watt

4. Next, let’s look at surge protectors for the various pieces of equipment in your Rig.  Surge Protectors protect only what is plugged into them and only for overvoltage surges.  Surge Protectors do not protect for under voltage or high voltages.  Shown below is a pair of good simple surge protectors;

Surge Protectors

There are Appliance Surge Protectors made just for appliances likemicrowave and coffee makers

Appliance Surge Protector

AC refrigerators, freezers

Refrigerator/Freezer Surge Protector


These special surge protectors offer extra features like audible alarms, flashing lights, displays, etc and are to be used with just the items listed on the packaging for the one you would buy.

5.  Next is a group of power management items that will protect your entire Rig not just one item or several items in it. First is the Portable Power Management System This type of system looks at High and Low voltage protection, time delay for air conditioning compressor startup, 3-mode surge protection, reverse polarity protection, open neutral protection, open ground protection, AC frequency protection accidental 220 Volt protection. Includes an Integrated information panel, previous error code display is weather resistant and has a built-in locking bracket so it can be chained to the power pedestal at the campground to prevent theft.  The only thing this unit cannot do is flush the black water tank.  The miracle unit we are talking about is shown below.

30 Amp Portable Power Management System

These portable units come in two sizes the one above 30 amp and the one shown below 50 amp.

50 Amp Portable Power Management System

Let’s say you were involved in a lightning-caused power surge at a campground.  It is estimated you would suffer approximately $3000 worth of damage to the electrical system of your Rig along with the things plugged into it.  The features of the 50 amp unit are the same as the 30 amp unit.

Ah, but there is more!  What happens if you do not want something portable but something more permanent in the Rig? Then you have the permanent installed units which are called Fixed Power Management Systems  These units are not really DIY type of items but, they can be installed by the DIYer if care is taken during the installation.  The 30 amp models is shown below;

 30 Amp Fixed Power Management Systems

There is also a 50 amp version of the same unit as above and can be found here;  50 Amp Fixed Power Management Systems .  The features of both units are the same and are,  high and low voltage protection, time delay for air conditioning compressor start-up, 3 mode surge protection, surge trip indicator, reverse polarity protection, open neutral protection, open ground protection, AC frequency protection. Accidental 220V protection, with the remote information display panel, and unit bypass switch.  Unfortunately, this unit also does not dump the black tank.


I hope that you now have come to the conclusion that some type of power management is needed to protect your Rig, its contents and YOU!


Until Next Time

Tools Of The RV Trade

What tools do you need to have when RVing?  If you ask 10 RVers you will get 10 answers.  That’s because we all seem to run into problems with our RV that is a bit different from the next RVer and the tools to fix the problem that arose is slightly different. But there are some basic tools of the trade, so let’s talk about those.

You will find that you will need something to put whatever tools you decide to carry into something that is strong but light.  Tools have weight and it does not take too many until you have added measurable weight to your rig. So here is a tool box that works.Simple Tool Box

Simple Tool Box

Now that we have a toolbox, lets see what needs to be in it.

A screwdriver Multi Screwdriver

Multi Screwdriver

I chose one like above because it cut down on weight and space in my tool box.  If you rather, you could buy two flat blades (one large, one small) and two phillips screwdrivers a #2 and #1 or an  additional size of your choice.

You will need a special set of screw drivers for use with those pesky square headed screws that are used around the inside and the outside of the rig. These special square screw drivers are shown below.

square screw drivers

A set of basic pliers is next.  You will need several types.  Here is an example Basic Pliers

Basic Pliers

You will also need several advanced pliers, such as the ones shown below.

Slip Joint Pliers

Vice-Grip Pliers

Vice-Grip Pliers

You will need and use all the above pliers.  It is just a matter of time.  Next we move on to crescent wrenches.

#8 Crescent Wrench (8″ Crescent Wrench )

8″ Crescent Wrench

#10 inch Crescent Wrench (10 inch Crescent Wrench)

10 inch Crescent Wrench

Now for the special stuff.  This is stuff you need but will not use monthly.  I use this stuff yearly.  The first is the torque wrench.  This is used to check the lug nuts on the tires of the rig to make sure they are tighten to factory specifications.

Torque Wrench

3/8 inch Extension Bar Kit

3/8 inch Extension Bar Kit

The extension bar kit is used to get the torque wrench outside of the tire rim for a safer tightening of the nuts that hold the tires.  You will also need a drive socket that fits your tires lug nuts and is made for a  3/8″ drive.

If you have a Suburban water heater you will also need a breaker bar shown below, to remove the anode to check the anode as well as to replace the anode if needed.

3/8″ Breaker Bar Wrench

Suburban Water Heater Anode

You will also need the socket that fits the anode, along with the white plumber’s tape

Plumbers Tape

to prevent water leaking around the threads.

Hex Key Set

Of course a hammer is also a tool that should be carried

Hammer

To see into those dark areas around the RV you will need a small but powerful flashlight.

Cree 7W Mini LED Flashlight

One tool that I have that I really like is not really a tool but my multimeter.  I can check to see if there is voltage what kind and how much.  I can check for open and shorted wires as well as other things.  I highly recommend one for your tool kit.

Multimeter

Another tester that is handy, and some people think it should be a mandatory basic tool is the AC voltage monitor.  This shows what the park voltage is at any given time, (low voltage can damage your RV electrical system and electronics) and shows if the power pedestal is wired correctly if plugged into the pedestal before plugging in the RV.  You may have to get a Short jumper from 30 or 50 amps to standard AC wall socket to test the pedestal. Meter is shown below.

AC Power Monitor

The following is the tool I would not be without.  The multi-tool.  I carry this tool on my belt and I even bought the expansion kit for it.  You just never know when you need a screwdriver or pliers to tighten or loosen something.

Multi-Tool

I know someone will say, this is not all you need and will give me a list of stuff as long as my arm.  Things like gorilla tape, super glue, black electrical tape, clear and white silicone caulk.  I agree they are important and should be carried, but as I said earlier. This is the basic list and like American Express “I never go RVing with-out them”

Until next time.

Campfire Safety

As we all get ready to start camping or have already started.  I am reminded that in many parts of the USA you can not have a campfire do to outdoor burning restrictions caused by the lack of RAIN.  So many of us remember the nights spent by the fire watching the sparks work their way up into the air from the burning logs and hearing the original snap, crackle, and pop. (sorry Kellogg)  Well things have changed that’s for sure.  First in many states now you can not bring firewood from one state to another or even from one part of a state to another do to bugs, worms, and what have you.  You must use the firewood that is at the park store or Ranger station.

How far is too far to move firewood? And what is meant by “local” firewood?  When discussing local firewood, I am referring to the closest convenient source of wood that you can find. That might be from down the street, or a state forest in your county. As a general rule of thumb, 50 miles is too far to move firewood, and 10 miles or less is the max firewood should be moved.  In many states there are rules, regulations, and quarantines that clearly state how far is too far. Always acquaint yourself with local rules and regulations when transporting firewood from one jurisdiction to another.  Find out more here Don’t Move Firewood .

So you buy some firewood from the Ranger’s supply at the park and you can burn it during the time you are in the part but you have to leave what you do not burn behind.  How can you make a camp fire fun and exciting?  Well, S’mores are fun to make S’mores.

When you are done making the S’mores you might want to be amazed by the camp fire northern light show.  Camp Fire Northern Light Show .

Now sit back and enjoy the rest of the evening and watch the light show from your camp fire.

What happens when you can not burn wood but you still want to sit around a campfire.  Well the solution for that is the gas campfire.  Most RV camping areas do not have a problem with the gas campfire even if there is a burn ban because the fire does not give off sparks and with the turn of the gas valve the fire is off.  You can still make those S’mores the kids want and you can still enjoy sitting outside of the RV around the campfire.  See Portable Gas Campfire for what I am talking about.

This portable gas campfire runs off of LP gas either the little 1lb green cylinders (runs for 2hrs) or the 10lb gas tanks.  It runs for hours and the red cover is used for storage and to elevate the gas campfire off the ground.  Also the red cover has the carry handle attached.  With the extra accessory you can even cook on the campfire just like a fire log one.

With any fire outside you need to have a fire extinguisher at the ready just in case.  Not just for grass fires. Fire Gone White/Red Fire Extinguisher – 16 oz

Until next time.

Is Your Pet Safe in Your RV When You’re Gone?

This has been a major question with RVers traveling with their pets.  For some it was a reason not to go to a museum or sight-see some special area because there was no way to know. We have all read the horror stories of an RVer coming home to find their pet in a fight for its life or dead because of overheating in a hot RV.  Or worse yet did the power at the RV  park go off and come back on and reset everything, so that the air conditioning or heating system is not set to the right temperature?
With modern technology it should be simple and affordable to know if your pet is safe, while you are out enjoying the sights near where you are camping.  Lets look at some things that may work for you.
1. You will need an Android Smartphone that you will leave in the RV full time.  I would suggest a low cost  pay as you go Verizon phone.  The reason for Verizon is that, a Verizon Phone will work in more places than any of  the other Wireless Phone Companies. And for an RVer who is moving all the time you never know where you will be.

  • The phone needs to have bluetooth
  • Temperature Monitoring Feature (SamSung Galaxy 3 for example)
  • The phone must be rechargeable
  • You need to have both the AC and DC charger for the phone
The Verizon Moto G Prepaid Phone is an Android Smartphone that has most of the features you need.
Verizon Moto G Prepaid Phone

You will need to locate the phone where you get the best signal from Verizon and that is also near an AC power outlet.  You will also need to download from the Google Play Store an Application called
Temperature Surveillance” located here Temp Surveillance .  The way this system works is the phone monitors your RV with your Android Smartphone. The day to day phone you normally carry with you will get an text message (SMS) if the RV  gets too hot, too cold or if a power failure occurs. The text message you will receive will  contain information about the RVs temperature and if there is a power failure or not in the RV.  All you have to do is tell the App the temperature limits high, low, and the telephone number where you want to receive the text alarms. Then just leave the RV Android phone plugged into the AC  in the space you want to monitor and you are done.

Positive: Simplest and cheapest method to monitor RV Temperature.
Negative: May not work with all cheap smartphones.
2. You will still need the Verizon phone above.  However for those smartphones that can not use the Temp Surveillance App here is another choice. The Elertus™ sensor monitors and sends alerts to your phone the instant an important door is opened/closed, a light is turned on/off, if temperature or humidity levels hit critical trigger points, or if the sensor is moved. In this case the Verizon RV Smartphone will have to be used as a Hotspot.  The Elertus will call your daily carried phone and report what the problem is.  This gives you time to get back to the RV and correct the problem.
 Some of the features of the Elertus are listed below.
  • 100% wireless, place it anywhere
  • No fees or subscriptions!
  • connects via wifi
  • temperature (-20°F to 150°F)
  • humidity (0 – 100%)
  • movement (accelerometer)
  • door sensor (open/close)
  • light sensor (on/off)
  • connection loss (wifi)
  • battery (0 – 100%)
  • free mobile app
  • access from anywhere
  • manage multiple sensors (ten per account)
  • alerts multiple users

To get more information on the Elertus system go here Elertus System of Remote Sensing

Here again the sensor sends information to you about the temperature in the RV and if power has failed.
3.  Another system (we are getting pricey folks) is Temperature Alert .  This unit would use the RV Wireless Phone as a HotSpot and send you text messages about the temperatures in your RV.
Temperature Alert Wi-Fi

The system does work well, but for some of us, it is a bit pricey.
The above unit is Temperature Alert Wi-Fi here is the Temperature Alert Cellular version of the same unit.

There are two more systems coming online later this fall
4.  The Wimoto THR001 Thermo Bluetooth Smart Thermometer Sensor.  This sensor will send the temperature information by Bluetooth to a device that will post the information to the Web using your RV Phone as a HotSpot.  Some of the features are listed below the picture.  This unit will be available later this Summer or early next Fall.

Wimoto THR001 Thermo Bluetooth Smart Thermometer Sensor

Some of the features are listed below;

  • Both infrared non-contact and needle probe thermometer in one. Infrared range 0 to 212 Fahrenheit. Probe range is -50 to 500 Fahrenheit.
  • Relays information to Bluetooth 4.0 SMART Ready devices such as iPhone 4S/5/5C/5S and certain Android phones and tablets with up to 100ft range
  • Acts as a datalogger when no smartphone or tablet in range and records information periodically for up to a month at a time.
  • Runs for 1-3 years on a single battery (user changeable) and weather resistant
  • Integrates with Wimoto Cloud Cube for real-time, always-on updates via the Internet

The thermometer sensor will send its information to the Wimoto Cloud Cube which will send the information to the internet and then be passed on to your everyday carried Smartphone.

Here is what the company said about the Cloud Cube; “Connects Wimoto Bluetooth SMART sensors to the Wimoto cloud service via Wifi. Extends the range of Wimoto sensors so that can be accessed from anywhere you have Internet connectivity.”  Here is a link to the Wimoto Cloud Cube that will be available late Summer 2014 or early Fall 2014.These are some of the best ideas currently available or that will be available soon.  It is important for all pet owners to enjoy RVing and that can be difficult when you are afraid to leave your pet behind in your Rig and strike out for adventure.

How hot is it in your Rig?  Now you will know.

Until next time.