Campfire Safety

As we all get ready to start camping or have already started.  I am reminded that in many parts of the USA you can not have a campfire do to outdoor burning restrictions.  So many of us remember the nights spent by the fire watching the sparks work their way up into the air from the burning logs and hearing the original snap, crackle, and pop. (sorry Kellogg)  Well, things have changed that’s for sure.  First in many states now you can not bring firewood from one state to another or even from one part of a state to another do to bugs, worms, and what have you.  You must use the firewood that is at the park store or Ranger station.

How far is too far to move firewood? And what is meant by “local” firewood?  When discussing local firewood, I am referring to the closest convenient source of wood that you can find. That might be from down the street, or a state forest in your county. As a general rule of thumb, 50 miles is too far to move firewood, and 10 miles or less is the max firewood should be moved.  In many, states there are rules, regulations, and quarantines that clearly state how far is too far. Always acquaint yourself with local rules and regulations when transporting firewood from one jurisdiction to another.  Find out more here Don’t Move Firewood .

So you buy some firewood from the Ranger’s supply at the park and you can burn it during the time you are in the park but you should leave what you do not burn behind.

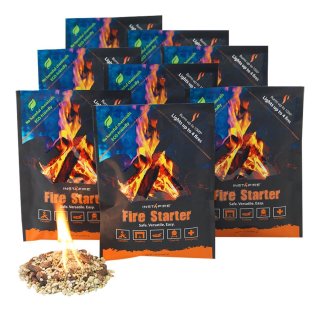
You have firewood from the local area and you have piled it up in the fire pit and you get ready to light it, but how do you get the green wood, high in moisture content, to burn without dumping a bottle of charcoal starter one it.  One fun idea is to use to get the wood burning is InstaFire .

InstaFire Fire Starter

These little fire starter pouches can get a fire going almost anywhere and burn hot enough to get not so great firewood started.

How can you make a campfire fun and exciting?  Well, S’mores are fun to make S’mores.

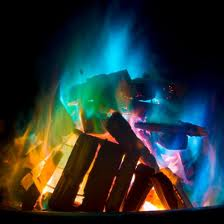
When you are done making the S’mores you might want to be amazed by the camp fire northern light show.  Camp Fire Northern Light Show .

Now sit back and enjoy the rest of the evening and watch the light show from your camp fire.

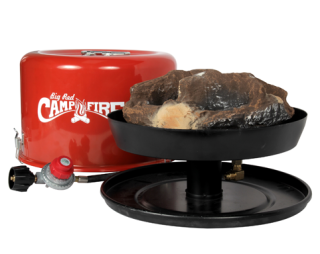
What happens when you can not burn wood but you still want to sit around a campfire.  Well, the solution for that is the gas campfire.  Most RV camping areas do not have a problem with the gas campfire even if there is a burn ban because the fire does not give off sparks and with the turn of the gas valve, the fire is off.  You can still make those S’mores the kids want and you can still enjoy sitting outside of the RV around the campfire.  See Portable Gas Campfire for what I am talking about.

This portable gas campfire runs off of LP gas either the little 1lb green cylinders (runs for 2hrs) or the 10lb gas tanks.  It runs for hours and the red cover is used for storage and to elevate the gas campfire off the ground.  Also, the red cover has the carry handle attached.  With an extra accessory, you can even cook on the campfire just like a fire log one.

With any fire outside you need to have a fire extinguisher at the ready just in case.  Not just for grass fires. Fire Gone White/Red Fire Extinguisher – 16 oz

Until next time.

Don’t forget to join the Weekend RVers group on Facebook a no DRAMA place with Hints, Tips, Free Stuff, Recipes, for every kind of RVer.


And finally, please remember that this blog is an Amazon affiliate. When you order something through any of the Amazon links, it doesn’t add anything to your cost, but I do earn a small commission on everything you buy. Just click on an Amazon link, then shop as usual.

RV Stocking Stuffer Ideas From Facebook

I am sure most of us have gotten the big RVer Christmas Gift for this year and just need a few odds and ends to fill in.  If that is the case and you need some small RVer gift ideas here are a few that have been suggested by people on Facebook.

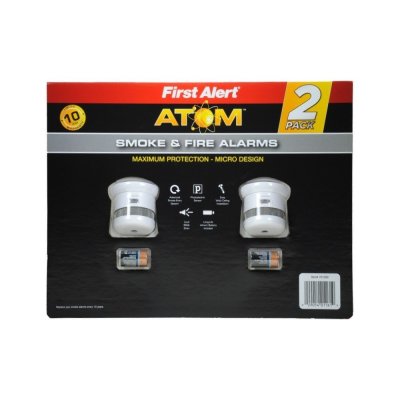
A. First is smoke and fire alarms for the basement storage of a TT or 5th wheel.  Are you protected in those areas?  I wasn’t but I am now.

Smoke and Fire Alarm

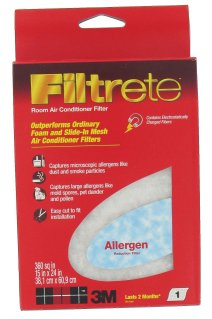
B. Next is a product that is used to replace that foam filter stuff that you find when you clean the Air Conditioner cover.  You don’t do that?  Never knew that there was a filter behind the ceiling A/C grate. Well now you do.

You will need to cut the filter material to match the current filter.

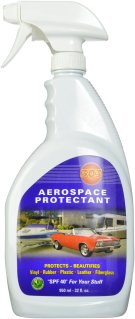
C. How about a protectant that you can spray on just about anything on a RV to protect it from Sun and weather.

Regular use gives 100% prevention of UV caused slow-fade

303 Aerospace protectant keeps UV-sensitive materials “like new” year after year.

D. When you have a squeak what do you use to get rid of it? When something is hard to turn what do you use to free it up?  You should not be using WD-40. You should be using.

Contains PTFE for long-lasting protection

Withstands extreme load carrying situations

Displaces moisture and seals out corrosion

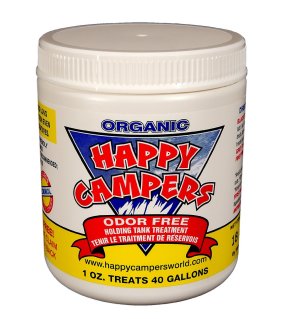
E. For those black tank watchers.

ODOR FREE: absolutely no chemical or sewer smell

ORGANIC: biodegradable, environmentally friendly, septic tank friendly

EFFECTIVE: in extreme hot & cold temperatures ( over 100°f )

EXTENDED DUMP INTERVAL: keeps on working ( don’t have to add more before dumping )

LIQUIFY: waste solids & most ordinary household tissue ( no expensive special tissue needed )

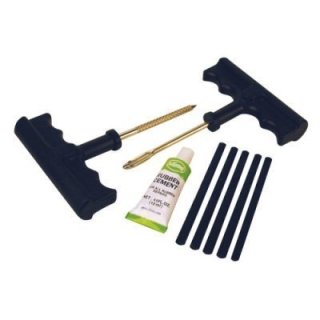
F. To repair a tire on the road or dry camping you need one of these Tire Repair Kits.

Tire Repair Kit

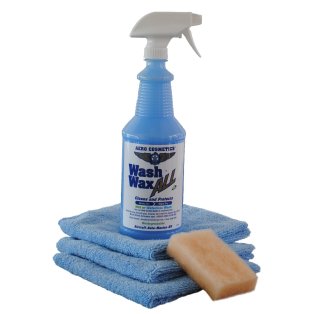
G. When you need to wash off your tow vehicle the front of the RV and you don’t have or can’t use any water.

Can be used as Waterless Wash or Just spray on after wet washing to Wax As You Dry. Works on wet or dry surfaces. Kit includes 1 full 32oz spray bottle , 1 mini bug scrubber and 3 Microfiber towels. Waterless Wash up to 8 cars or Wax As You Dry 12 cars. Leaves a non-stick UV protective coating on ALL surfaces

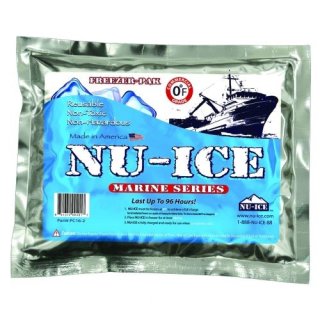
H. To keep things frozen while going to your campground try this.

Nu-Ice Freezer Pack

Nu-Ice is a non-toxic, non-hazardous, chemical freezer pack capable of maintaining a sub-zero temperature “charge” in a freezer or other insulated environment for an extended period of time. This is accomplished by charging the pack to initiate the simple chemical reaction within the pack. The pack immediately begins to absorb energy (heat) and emit sub-zero temperatures once environment temperatures begin to rise. These packs are safe, environmentally friendly and re-usable up to five years! Therefore, the Nu-Ice packs are a great alternative for gas emitting dry ice as our pack do not require special handling, training or costly haz-mat shipping fees. 5 lb.

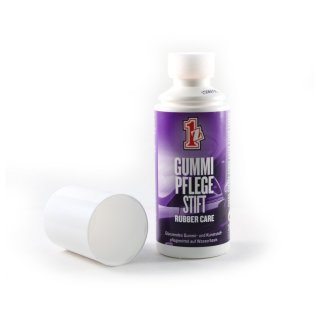
I. With all the rubber weather seals our RVs have we need a rubber protectant.

Rubber Seal Protectant

Gummi Pflege is a special rubber treatment that conditions rubber weather seals on car doors, windows and trunks reducing squeaks, rattles, wind noise and potential water leaks. Gummi restores color to dried out rubber and keeps them elastic while protecting them against the damaging effects of heat, freezing temperatures and UV rays. It uses a petroleum free, water-based formula. Easy-to-use shoe polish type applicator makes application simple without the mess.

J. To dry you off quickly and then dry itself quickly you need a special quick drying towel.

Quick Drying Towel

Microfiber with super soft ultra-suede finish

Remarkably absorbent and fast drying. Machine washable

Features a silver-ion antibacterial treatment. The microfibers are given a permanent coating of silver ions, which prohibit the growth of bacteria and other microbial life. The result is a towel that doesn’t smell or transmit germs

Packaged in Mesh Bag

Sizes XS: 12″ x 24″, 1.3 oz; SM: 16″ x 32″, 2.2 oz; MD: 20″ x 40″, 3.6 oz; LG: 24″ x 48″, 5.1 oz; XL: 30″ x 60″, 8.1 oz

K. How about a nice flag or turn it into a picture to hang in the RV?

Just Go Flag

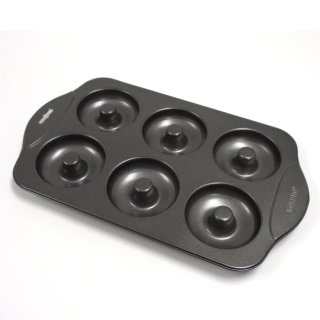
L. All most every RVer that I know likes Donuts.  With below you can make your own fresh daily.

Pan makes 6 standard donuts at a time, each 3.5 inches/9cm diameter

Durable nonstick coating helps ensure effortless food release

Recipes and instructions included

Hand washing recommended

Until Next Time.

Don’t forget to join the Weekend RVers on Facebook a no DRAMA place with Hints, Tips, Free Stuff, Recipes, for every kind of RVer.

Don’t Like Your RV Faucets? Change Them!

As you might have guessed, RV manufactures do not use the best or the most expensive faucets when building your RV.  You might just love your sticks and bricks faucets and hate your RV faucets. What can you do with those RV faucets?  Replace them with new faucets.  You can use regular sticks and bricks faucets.  The only thing you need to do is measure the spacing between the handle holes.

Faucet Hole Spacing

Be sure to turn off the water to the RV and relieve the pressure (if any) in the hot water tank. Then turn on the hot and cold handles of the faucet you want to replace.  Clean out the stuff underneath the sink. Get a flashlight and look up underneath the sink and see how the water lines are hooked to the current faucet. You may have to get yourself up under the sink bottom to see what is going on. But you should see something like the photo below.

Faucet Water Connection Under The Sink
Sometimes a red plastic pipe is used for hot water and a blue or white plastic pipe is used for cold.
The fittings should only be hand tight.  If they are on the faucet stem harder than hand tight use a Channel Lock Pliers
Channel Lock Pliers 
and carefully loosen the fittings. Now you should see two black or blue flat plastic nuts with wings sticking out. See photo above for the flat nuts above the white water line.  Use you channel lock pliers to loosen and then remove these nuts.  What you have left should look like below.
Bottom of faucet shafts without water lines or black plastic wing nuts
Now you can pull the faucet out from the top.  Clean off the area where the old faucet was and get ready to install the new one.
For the kitchen faucet you can use. (Low Cost Kitchen Faucet )
Low Cost Kitchen Faucet 
You can also use a kitchen faucet with an integrated sprayer. (Kitchen Built-in Sprayer Faucet)
Kitchen Built-in Sprayer Faucet
You should double check the water feed line spacing before you make your purchase.
Here is a chance to put the faucet of your choice in the color and style you want into your kitchen.
So how do you put everything back together? Clean the area that the old faucet sat on with your favorite cleaner.  You want to make sure there is nothing on the top of the sink where the new faucet will be going.
Put the new faucet together according to the manufacturer’s instructions.   Then apply some Kitchen and Bathroom Caulk
Kitchen and Bathroom Caulk
around the bottom of the faucet (unless the faucet manufacturer says not to.)
and put the water stems into the holes in the top of the sink.
Bottom of faucet shafts without water lines or black plastic wing nuts

 
Put the black flat nuts back on and tighten them down tight.  You can use your pliers to tighten the black nuts down to be sure they are tight.  Then put the water lines back on.
Faucet Water Connection Under The Sink
Caution If the faucet stems are metal you may need to use plumbers tape.
Plumbers Tape
Just wrapped the tape around the metal stem before you screw the plastic water line back on.  If the faucet stem is plastic you should not need the plumbers tape. Make sure the new faucet is turned off and then turn on your RV water CHECK FOR LEAKS and enjoy your new faucet.
For the bathroom sink you can just follow the above instructions for that sink as well.  The bathroom sink is where you can get fancy and make something that is really yours.
Bathroom Faucet
Brass Bathroom Faucet

Until next time.

How to Save Money While RVing or Getting Started RVing

I see all the time on RVing Facebook pages and on RVing Blogs the question “How expensive is it per [week, month, year] to full time RV or even just to set up an RV with the stuff I will need?

One place that gets very few mentions from posters is your local Salvation Army, Goodwill or local thrift store.  While I am not a spokesman for any group.  I would like to remind you that if you really want to save money while you are full timing or just setting up your new RV.  You should give them a look. 

If you want more variety than what you find on your average department store shelves. Most Goodwill stores introduce more than 2,000 new items onto the sales floor each day.  You can stop by one of more than 2,700 stores in the United States and Canada or you can even  shop online at “shopgoodwill.com” to snag basic items and one-of-a-kind finds.  You can for example take this worn out table, found at my local Goodwill Store. And with a little magic 

and turn it into this for your RV.

Wow, that is a nice looking table  But maybe you could do better.  Goodwill has a huge selection of stuff that varies per store, so if you do not see what you want at one store the next Goodwill store will have something completely different.

For example, here is a great chair find.

Which could have been left as is.  But with a little magic and some imagination could turn into this.

How about that?

If furniture is not your bag, sorta speak, then maybe clothes is your bag.  You can go to any Goodwill or thrift store and find thousands of gently used clothes for everyone in your family as prices well below even Walmart in many cases.  Remember that no two Goodwill or thrift stores will have the same selection.

For example how about this,

there is a lot of good used clothes on those tables.  If you do not believe me, then just ask these two ladies,

the clothes they have on came from their local Goodwill Store.  Looking behind them you will see racks and racks of gently used clothes.

How about the kitchen?  You could save a virtual ton of money by buying kitchen supplies at a Goodwill or thrift store.  For example how about any of the shown items for less than $10 and most under $5.

Not just one item the whole set for less than $20

I think you have seen the light.  If you break one of the items you don’t even need to cry, because its replacement is just as cheap as what you paid for the original item in the first place.

Tools for the junk drawer and for the RV can also be purchased at the Goodwill Store.  I have shown below some items under $20 all the way down to under $10 as examples of what you can find to keep the cost of getting started RVing down, way down.

For more details on the type of tools you should have with you when RVing go to Weekend RVers Blog and read “Tools of the RV Trade”.

I hope that at the least I have planted the seed to use thrift shops, Goodwill, Salvation Army and other recycle shops to save money before and during your RVing adventure.

Until Next Time


Smoke, Fire, Gas Safety

Did you know that there is a date code on the smoke detector as well as your carbon monoxide detector in your RV?  Did you know that the propane detector in your RV has an end of life?

I sure didn’t know.  If you are just changing the detector batteries at the beginning of each RV season and removing the batteries at the end of each season you may not be doing everything you  need to be safe, there is more to it.  When was the last time you tested all your detectors to be sure that they all worked? (In many cases pushing the test button on the detector does not test the most important part of the detector, the sensor.)  Do you know how to test the detectors?  When is the last time you had a fire drill in your RV?

Let’s look for some answers.  On the back of every smoke detector there is a date code.  You may have to hunt for it but it is there.

Beginning in 1999, Underwriters Laboratories (UL) required the manufacturing date code on the back of the device to be printed in plain English. This information may appear on the back of the device, on the face of the horn, in the battery compartment or on the top sensing chamber.

It is widely held in the RV industry that if your detector is more than five years old, or is out of date, it should be replaced.

Some detectors have permanent batteries built-in and others need to be replaced annually.  Always use alkaline batteries when replacing batteries in detectors.  Alkaline batteries last the longest in low power usage situations, such as detectors.

Now let’s talk turkey.  Most RV manufactures use the lowest cost, simplest smoke detector they can in their rigs.  So false alarms and the possibility of alarm failures are there.  What can you do, upgrade your standard smoke detector to a combination ionization and Photoelectric smoke particle alarm such as the

Kidde Model Pi9010 Dual Sensing Smoke Detector .

These alarms have fewer false alarms and will give you and your family more time to get out if there is an emergency.

Most fire safety experts agree that you have about 20 seconds to get out of a RV that is on fire before you will be overcome and not be able to get out.

Where should I put the smoke detectors in the RV you ask?  One should be in the Master bedroom and one in the Bunkhouse (if your RV has one).  Another one should be located in the kitchen area of the rig.

You can test this type of detector by using a burning candle near the detector and then blowing it out.  See what happens.  Also you can push the button located on the detector to test the battery.  Pushing the button just test the battery and the electronics and does not check the sensor inside the unit.  The candle does that.

Next we have the Carbon Monoxide detector.  This detector looks for the gas from combustion. CM gas is odorless, colorless, and tasteless.  This is a very deadly gas.  Every year there are deaths caused by CM gas when people run gasoline generators outside of their trailer. This detector can be located in the hallway to the bedrooms or in the bedroom itself.  Don’t forget to put one in the bunkhouse. It should be located off the floor about head high or higher. In my rig the detector is located on the ceiling. The CM gas is lighter than air and will be found near the ceiling first.  Here is the one that I have  Battery Operated Carbon-Monoxide Detector.

Battery Operated Carbon-Monoxide Detector

Be sure to replace the batteries at the beginning of the RV season (remove batteries at the end of season) and keep the surface of the detector clean.

The LP Gas Detector is the last of the required detectors in your RV.  This one usually runs off of the 12volt battery system of the RV.  It is located very near the floor usually in the hallway to the master bedroom, but not always.  This is the guy that will detect if you stove, oven, furnace, refrigerator, or any other LP gas product in the RV is leaking LP into your breathing space.  LP Gas is heavier than air and sinks to the floor and builds up from there.  It has an bad odor that has been added to the gas by the LP Gas provider.  So LP Gas is not odorless, you sure can smell it.  Unless of course you are sleeping.  If you smell gas get out, get out now, do not look for the leak just get out, and get help.

Here is a 12volt LP Gas detector that has gotten good reviews and could replace what you are currently using if after testing yours does not work or the 5 year replacement date is up.  Remember pushing the test button on a detector does not test the sensor just the electronics and sounder.  Here is a detector that has gotten good reviews 12v LP Gas Detector.

12v LP Gas Detector

So how do you test one of these?  Remember those BIC lighters and Charcoal Starters?  Well get down near the detector and flick the BIC but do not light it.  Hold the lighter near the detector for a few seconds and you should set the alarm going.  Stop the flow of gas from the BIC and blow on the detector to dissipate the gas and the alarm should stop sounding.

A word of caution here I think is advisable.  I have heard that people are replacing the two gas detectors with one that claims it will do both jobs.  I would not want to bet my family’s safety on this all in one detector.  These gases are not the same weight in the air one rises and one sinks, now how is one detector going to be in the right place to detect the right gas?  Just say’in.

Now lets talk about fire fighting.  Don’t do it.  Get Out!!!  If you must fight the fire to give yourself and your family more time to get out, do you have the right fire extinguisher?  Here again, in most cases, the cheapest fire extinguisher was installed in your rig.  When was the last time you check the extinguisher?  Now is good time before you start off for this season.  If it is a powder type, turn it over a few times to resettle the powder.  If it is a squeeze the trigger type what is the date of manufacture?  You should plan on replacing the trigger type ever six years or sooner if the gage says so.   RVers die every year from rig fires, use the fire extinguisher to give you and your family time to get OUT not to fight the fire.

You need a fire extinguisher in each bedroom, in the kitchen area, and at the front and back door of the RV.  I recommend using Fire Gone 2NBFG2704

Fire Gone 2NBFG2704

as the best you can get to give you more time.  If the kids are old enough be sure they can operate the Fire Gone and be sure to put one in the bunkhouse.

Because of recent fire events, the following fire suppression device was developed RV Refer Compartment Fire Suppression.

RV Refer Compartment Fire Suppression

Because of the number of fires that have been caused (or thought to have been caused) by refrigerators in RVs, a automatic fire suppression system has been developed, shown above.  This system is one the average RVer can install and will activate in the presents of a fire in the the refrigerator compartment of an RV.  While you still need to get out as quickly as possible this unit may put the fire out completely or give you more time to get out either way it is a plus.

OK the fire drill.  Do you know how to get out of your Rig if the front door is blocked by fire?  In each bedroom area of the rig as well as other locations you will see a window with a red leaver at the bottom.  With the word EMERGENCY EXIT printed on it.  Move the handle in the direction indicated and the window will open and you can climb out.  Of course it will be a real job because you may have forgot a few tools that will help make it easier.  First did you have your emergency window prop open stick?  If you said no, you should.  Take and old broom handle, rake handle, hunk of PVC, etc, and cut it to 24″ long and paint it red.  Attach two dots of hook and loop to the top and bottom of the stick and to the wall along side or below the window and voila you are ready.  When the emergency occurs open the window put in your prop stick and pull a blanket or comforter from the bed or a blanket from other area and lay it across the bottom of the window frame covering the exit handle area of the window.  This will stop you from being cut or badly scratched by the window frame as you crawl out.

Have a meeting place well outside of the rig area, that everyone knows and will meet at if there is a fire so you can take a head count and be sure everyone is safe.

Last but not the least.  Do the kids know how to get out?  Each season before you hit the road you should go over the fire safety rules and how to get out.

Rule number,

  1. GET OUT
  2. GET OUT
  3. NEVER FIGHT THE FIRE (you have approx 20sec to get out before you can’t)
  4. DO NOT GO BACK FOR THE DOG, CAT or GOLDFISH
  5. EVERYONE MEETS ACROSS THE ROAD

I am sure you get the picture.  Cats and dogs are part of the family for sure, but they are not humans and the kids and grandma are far more important.  Be sure to remind the kids of that.

Fire Safety Quick Check

  1. Test all Fire, LP Gas, and CM detectors
  2. Do not fight the fire GET OUT!!!!
  3. Know where the emergency exits are located
  4. Have an escape plan
  5. Have fire drills
  6. Be sure the fire extinguishers are up to date

Until next time

Can You Hear Me Know – Breaker Breaker 19

For this post I would like to discuss keeping in touch with the family while camping.  Many people in the good old days, used string and two soup cans or a CB walkie talkie to keep in touch with family members during camping.  Most of the campers in the olden time and even RVers today, nothing was or is used to stay in touch.  While some may believe that at cell phone is good enough, and it maybe  traveling down the interstate, in a campground in the wilderness or at the nearby lake you may find that the good old cell phone does not work, even a little.   You may find that the carrier you have is the wrong carrier for good service in the area that you are in, and that the other guy would have been a better choice.  What ever the case, today we have very small radios called FRS/GMRS that will last a long time on batteries, give you several miles of range, be quite and can even be set up for “selective call” so only your family members will hear you when you call them in for lunch or are backing up the rig.  RVers who are backpackers take note, these little radios can have weather radios and GPS built-in as well.

Let’s take a look at a few [shown below] and discuss their features and benefits in more detail.

Shown above are some Basic FRS radios.  They come as a pair when you buy them and have the following feature set.  The units come with rechargeable batteries, two belt clips, charging cable, AC adapter and have a range of 20 miles over flat and open terrain.  They offer a 12hr battery life.  As you can see the unit does not offer a lot of features but it works and could be used when backing the RV into that tight site, right next to the lake.

Above is shown a step-up model of an FRS/GMRS radio.  It can run on alkaline batteries for up to 10hrs or 8hrs on rechargeable batteries.  This model from Motorola includes 11 weather channels, 22 talk channels and each channel has 121 privacy codes, (selective call)  for privacy.  Range is 23 miles over flat and open terrain.  It comes with belt clips and 1 dual drop-in charger to charge the pair of radios at the same time to save you time.  Use one as a base station at the RV and give the other one to who ever you want to keep track of.  Additional units can be purchased so everyone who needs one has one.  This unit would be great for a fisherman to keep in touch while out in the boat on the lake.

 Calling all Backpacking RVers out there.  Here is an FRS/GMRS radio that has a built-in GPS or a GPS that has a built-in FRS/GMRS radio.  This unit is not low cost, but it does show that just about any need for communications while RVing can be met with a FRS/GMRS radio.  For the fun of it here are some of the features of this radio.  The radio has a 2.6-inch color touchscreen that is glove friendly.  A high sensitivity GPS receiver, a rugged waterproof case. Runs 18hrs on a set of batteries, and has a list of accessories as long as your arm.

While most of us will want a lower cost unit you need not suffer with little to no features.  Range, number of channels, the privacy feature (selective call), and battery life are the important ones to watch out for.

Safety and peace of mind make the weekend RV get away fun and exciting for the whole family and the ability to stay in touch with all members of the camping party does that for me and my family.


Until next time.  Over and Out?